•
Discover the cost to repair playground equipment. Learn about average prices, key cost factors, and tips to save on your playground repair project.
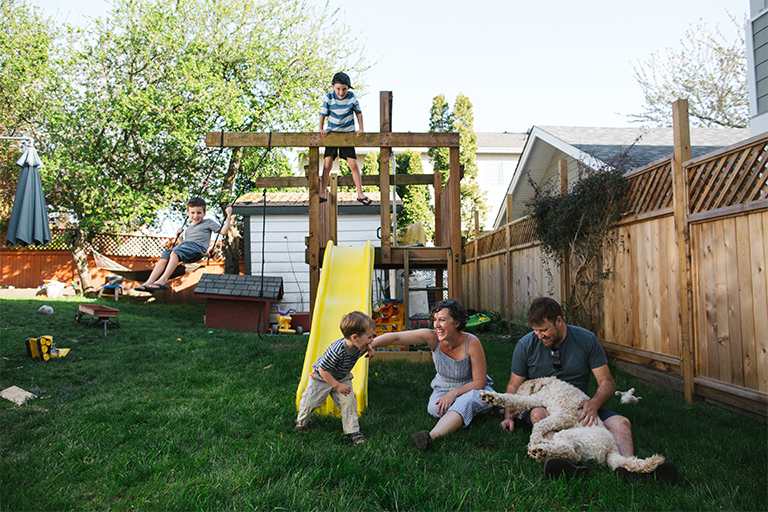
Follow these steps and you can turn your backyard into the ultimate playground

Your DIY playground needs at least 6 feet of clearance around all equipment, shade coverage, good drainage, and visibility from your home for safe play.
DIY materials cost $700 to $1,000 for lumber and supplies, while professional installation adds $330 to $700 to your total project expenses.
You'll set posts 42 inches deep below the frost line, pour concrete around each one, and attach platforms at your chosen heights for climbing access.
Hiring a local playground installation professional takes the guesswork out of post setting and platform leveling, keeping your backyard project safe and sturdy from start to finish.
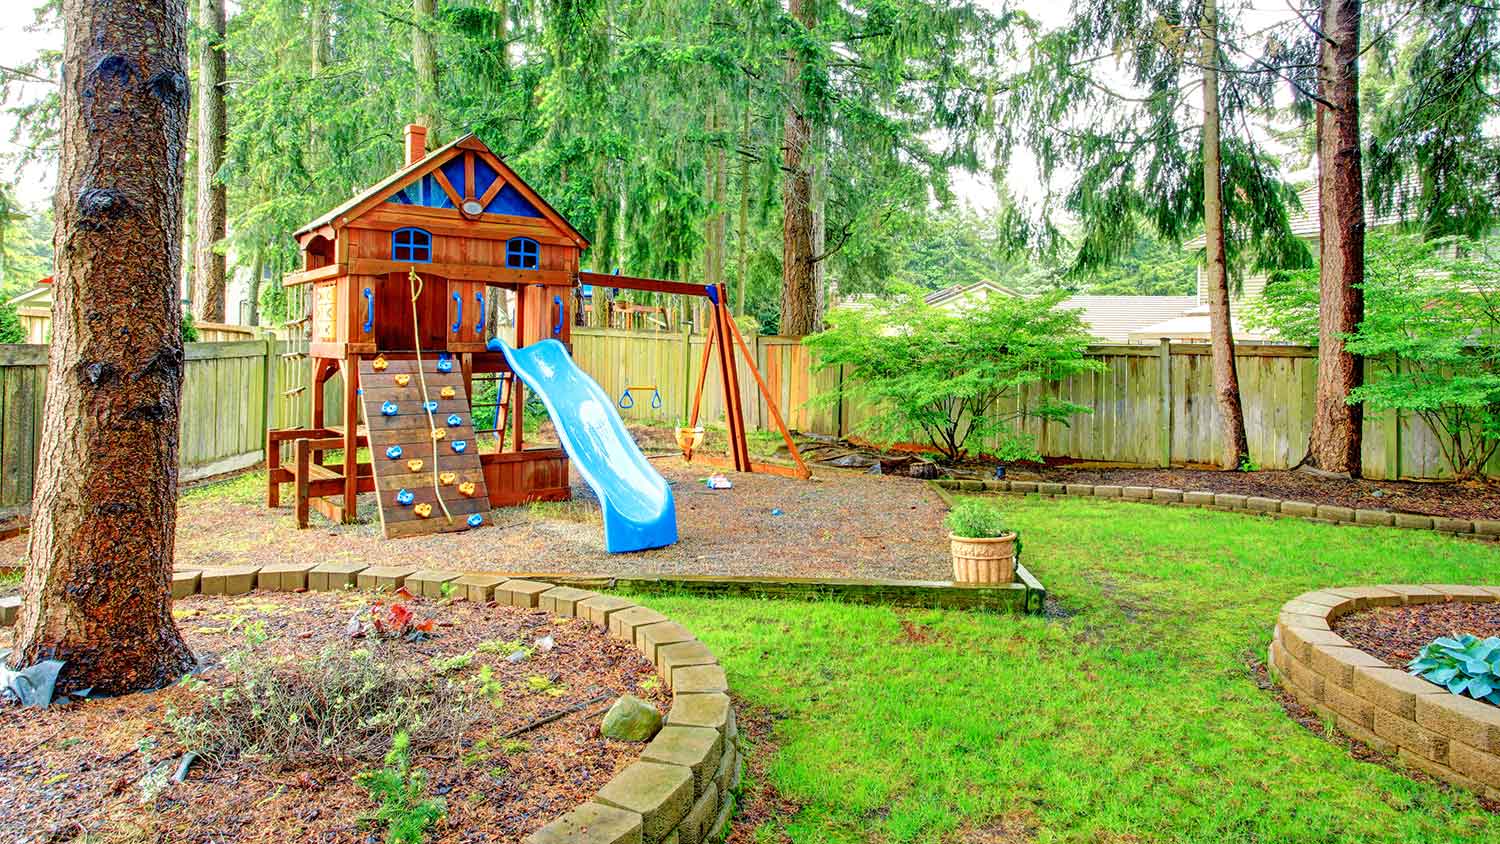
Dreaming of turning your empty backyard into a place your kids or grandkids will love to play? Adding playground equipment is a great way to get kids outside and active, but playsets can cost thousands to purchase and have installed. Instead, you can follow these steps to build a DIY playground using materials from your local home improvement store.
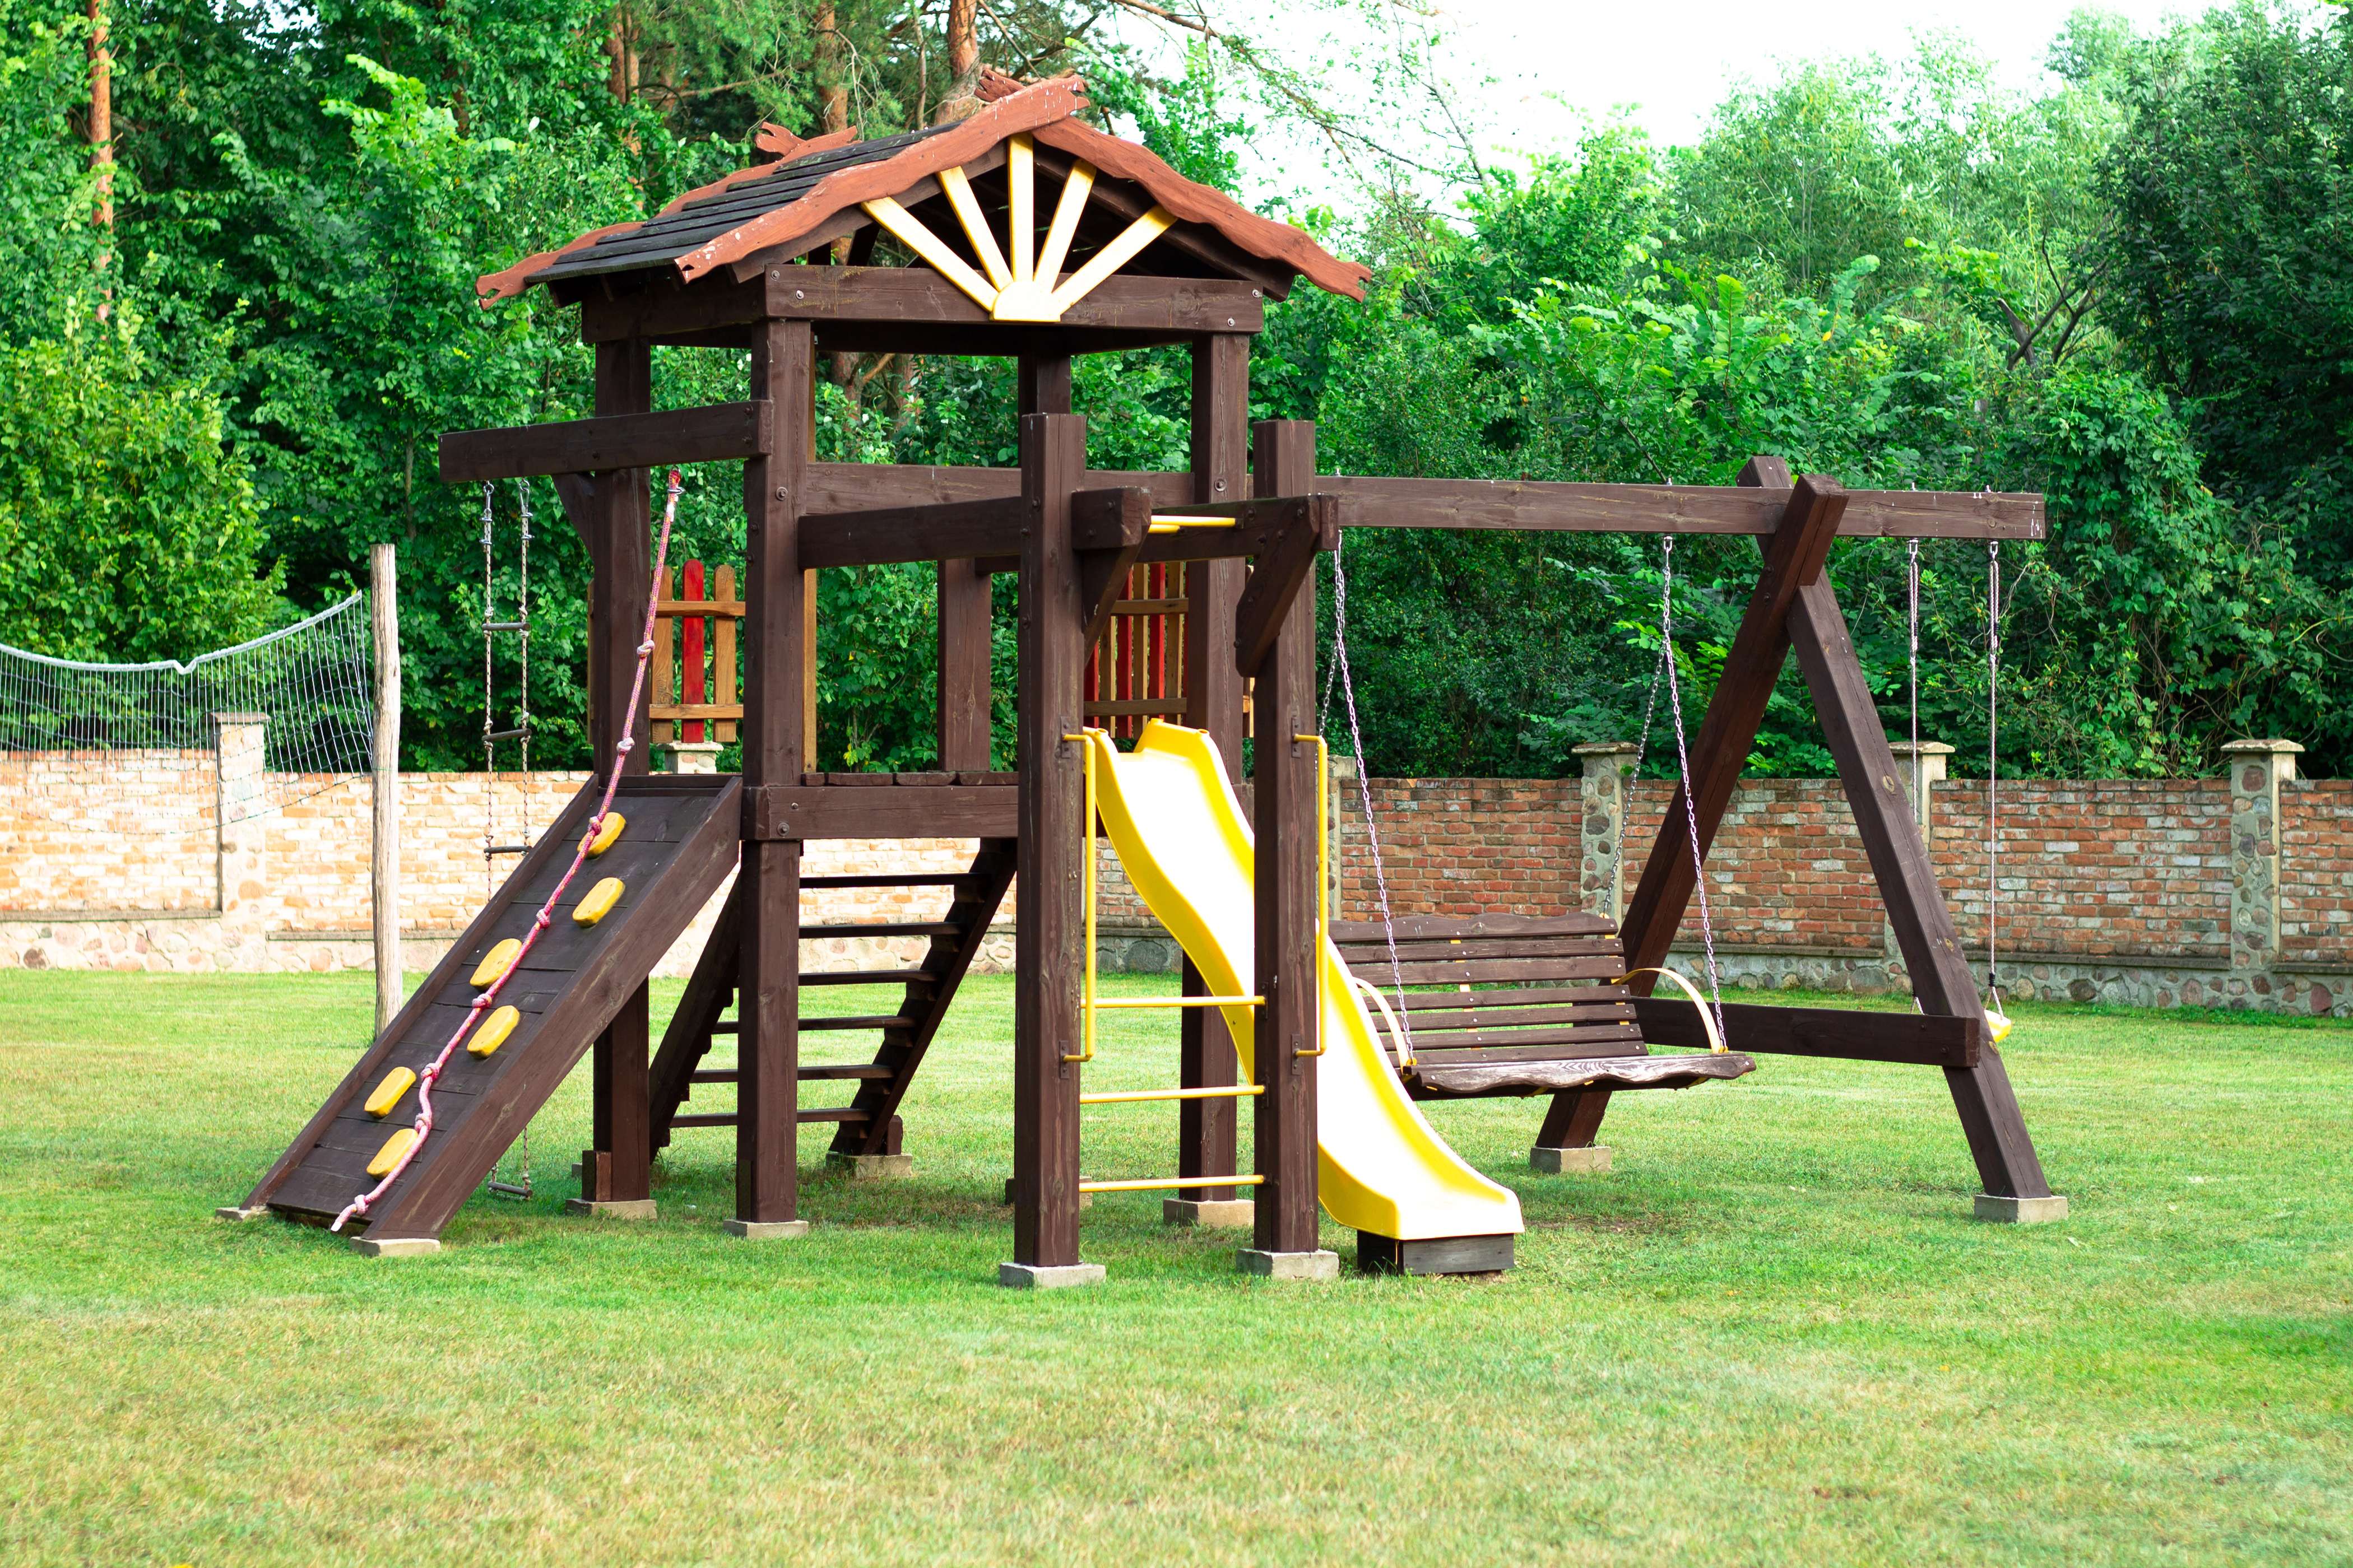
DIY playground construction allows the opportunity to include custom playground features to a central playhouse feature. Consider adding the following accessories to your playground:
Climbing structure or a method of reaching the higher levels of the playhouse, such as a ladder, rock climbing wall, or climbing net.
Various swing types, such as standard, belt, tire, bench, glider, trapeze, ball, bucket, or web swings.
Sandbox under or attached to the main structure.
A ready-to-install or DIY slide.
Monkey bars, zip lines, trapeze rings, firefighter’s pole, or similar climb-on and play elements.
Accessory features could include a ship's wheel, imitation telescope, flags, tic-tac-toe, or similar game components.
Now it’s time to get down to the nitty gritty. Follow this step-by-step guide to build your dream DIY playground.
Before you get started, you need to size up your backyard and find the perfect spot for your DIY playground. Try to do the following:
Avoid sloping areas, low-hanging trees, and wires
Position the area away from direct sunlight, under tall shade trees if possible
Find a spot that you can easily see from your home
Choose an area with good drainage that won’t easily flood
Find an area where you can allow at least 6 feet of open space around the equipment
For this DIY project, you’ll build a wooden structure laid out in a square, with one or two platforms at different heights. Using the lumber amounts and measurements we’ve provided, you can build a playhouse that rises up to 12 feet off the ground, 8 feet long by 8 feet wide at its base, complete with safety railings and a ladder.
You may wish to adjust these measurements to better fit your specific yard, but keep in mind that you’ll need to adjust your lumber measurements if you do this.
While this step won’t apply to every homeowner, some municipalities or homeowner’s associations require a local building permit or other prior approval for a project like a backyard playground. Be sure to do your research before you break ground.
Lay out the locations for your four corner posts. You’ll place your two additional posts halfway between corners on opposite sides. With a tape measure, measure the length of each side and the distance between opposite corners to ensure that they’re equal and that you have a perfect square. Take a step back and make sure the layout looks the way you want it to.

Mark your post hole digger with a piece of duct tape 42 inches from the tip of the blades. This will be the depth of your post holes, which need to sit below the frost line to prevent your playground from being pushed out of the ground during cold winters.
Drive the post hole digger into the ground and dig four or six holes, depending on how many posts you’re using. Widen your holes with a shovel so that each is about a foot wide, allowing enough room to pour concrete.
Setting posts for a DIY playset is similar to setting fence posts. If possible, have one other person help you. Mix your bagged fast-setting concrete in a wheelbarrow according to the instructions on the bag. One person should continuously work the concrete, so it doesn’t harden. Use three bags per post.
Place your first post in its hole, then pour concrete into the hole around it. Leave about six inches from the ground's surface to the top of the concrete. With your level, hold the post upright until it sets straight up vertically. Once the first post sets, use your circular saw to cut two of your two-by-fours at the dimension needed to reach from that post to the next.
Place your next post in the hole and use your drill to screw a two-by-four to each post at ground level. Repeat this with the other two by four at approximately eye level. These boards will provide the support you need to keep the structure square with your first post while all the concrete sets.
Pour concrete into the hole around the second post, then use your level to ensure it’s standing straight up vertically. Place your third post, then cut and attach two-by-fours for support just as you did between the first two posts.
Repeat this process until all your posts are in place and level. Give each post at least 40 minutes to set, or longer if specified on your bag. As they’re setting, check them each again with your level and adjust as needed.
Once all posts are completely set, remove the two-by-fours. Cut two-by-ten boards to the length of each side of your structure. Use your drill to attach these on all four sides at ground level. If you’re creating one raised platform, cut boards to the same length and attach them at your desired height for the platform.
If you’re creating two raised platforms, cut your boards to half the length of the structure. Attach four on one half at your desired height for the first-level platform, then do the same on the other half at your desired height for the second-level platform. Once all these boards are attached, the structure should be very sturdy. You may need to use your ladder to reach your desired height.
If your design includes a pre-purchased slide, be sure to set one of your platforms at the height necessary to attach it properly.
Cut your two-by-six boards so they can be attached to the inside of the two-by-ten boards for each platform. Space them evenly, leaving no more than a few feet between each board. These will support your flooring. Cut and lay your deck boards across these supports, screwing them in and ensuring that they are sturdy. If not, you need more support boards below them.
You could also add a floor to the bottom of your playset or lay a waterproof ground cover and install a covered pit for play sand.
To keep children safe, you’ll need to create rails that run the length of each side of your upper platforms. These can consist of a top, middle and toe-level two-by-sixes, spaced so that there’s not enough room for a child to squeeze through. You may have municipal guidelines that specify how wide these spaces should be, but if not, keep them less than four inches wide.
Determine where kids will be able to climb up and down from your playhouse and leave these spaces open without rails.

There are many ways kids could climb in or out of the playhouse, from prefabricated rock walls to rope nets, both of which can be purchased online. Alternatively, you can repurpose the two-by-fours you used for support while setting your posts to construct a simple DIY ladder. To get from one platform to the other, build a small step.
When designing your ladder, keep in mind the spacing between rungs your children will need as they climb. You’ll also want to ensure that the ladder is safely screwed to the playhouse and not propped up loosely against the side.
When your structure is complete and you have a safe way to climb up and down, you can attach any other accessories you’ve left room for. This may include a pre-purchased slide, steering wheel, rock wall, monkey bars, swing set, tire swing, tree swing, and more.
Now you and your family can enjoy your backyard playground. Be sure to keep up with regular playground maintenance to ensure that your yard remains a safe place to play.
One of my old tall evergreen trees was suddenly leaning toward the busy street in front of my house. I submitted a request for an emergency tree inspection, and Alejandro, owner of Cajete Tree Service, contacted me immediately and arrived to look at it just 20 minutes later. We agreed the...
This company does it right. Firstly, I want to say that Landan was a joy to work with. He was so kind, transparent, and had everything under control. His entire team showed up ready to work and they were all very respectful of the fact that we were in an office space. A little backstory – we...
We have used Window Warriors many times with no issues. They arrived on time and were very professional . We have pets and Window Warrior team treated them very well, well trusted team.
Excellent experience in mounting our 77 inch TV with in wall cable management. Service was efficient and would highly recommend!
Window Depot did an amazing job on my deck. I wasnt sure what I wanted to do, but their composite decking was affordable and will last a long time. I am excited to have family over, and I am no longer embarrassed by my backyard. Jeff and the ground crew were polite, respectful, and caring for...
Wonderful. I am going to have them remove and replace my driveway in the spring.
 All Star Paving and Sealing
It was wonderful working with Yordy and his team. They were very professional and are experts in what they do. They have completed the work on time, with better quality and with in fairly reasonable price. We just started with backsplash work , but liking his work, we went on to provide...
The team is awesome!! I can generally pick up and clean throughout the week, but they CLEAN! Windows, stair rails, microwave. All the things I can’t ever seem to get to regularly. The house looks and smells great after they leave.
Maple Tree Service should serve as a mentor for other business! Customer service was superior and beyond expectation. Response to request was prompt. The representative was very courteous and proud of the company. Quote was given during initial visit and work date established. A follow up...
 Maplewood Tree Service
We had water in our basement and Roto Rooter was original contact to evaluate the situation. We were informed that our sewer main was fractured and needed repair. We received their estimate and then looked for counter offers. Ohio Basement Authority came with the best quote for the work. Once...
From average costs to expert advice, get all the answers you need to get your job done.
Discover the cost to repair playground equipment. Learn about average prices, key cost factors, and tips to save on your playground repair project.
Learn how much rubber playground flooring costs, including installation, material, and maintenance, plus how to save and choose the best option for your home.
Discover the cost to install a backyard multi-sport court, including average prices, key factors, and tips to save. Plan your project with our breakdown.
Not sure how to hire a playground installation company? Learn what to ask, qualifications to check, and how to find the right pro for your backyard project.
Wondering who to hire to install playground equipment? Learn which playground installer to call and how pros deliver safe, compliant installation.
Building a playground for the kids in your backyard? Read our playground equipment checklist, which puts safety first and helps prevent unnecessary accidents.