

If your dated appliances don't impress, it's time for a refresh. We break down the cost to refinish appliances, including ovens, refrigerators, washers, and more.
Learn the basics of appliance troubleshooting

Appliance repair tips like checking the owner's manual and testing outlets help you troubleshoot issues before calling a pro.
Expect to pay $100 to $250 for most appliance repairs, with labor costs ranging from $50 to $150 per hour.
Your appliances work harder when filters and coils are dirty, so cleaning them every month prevents breakdowns and reduces energy costs.
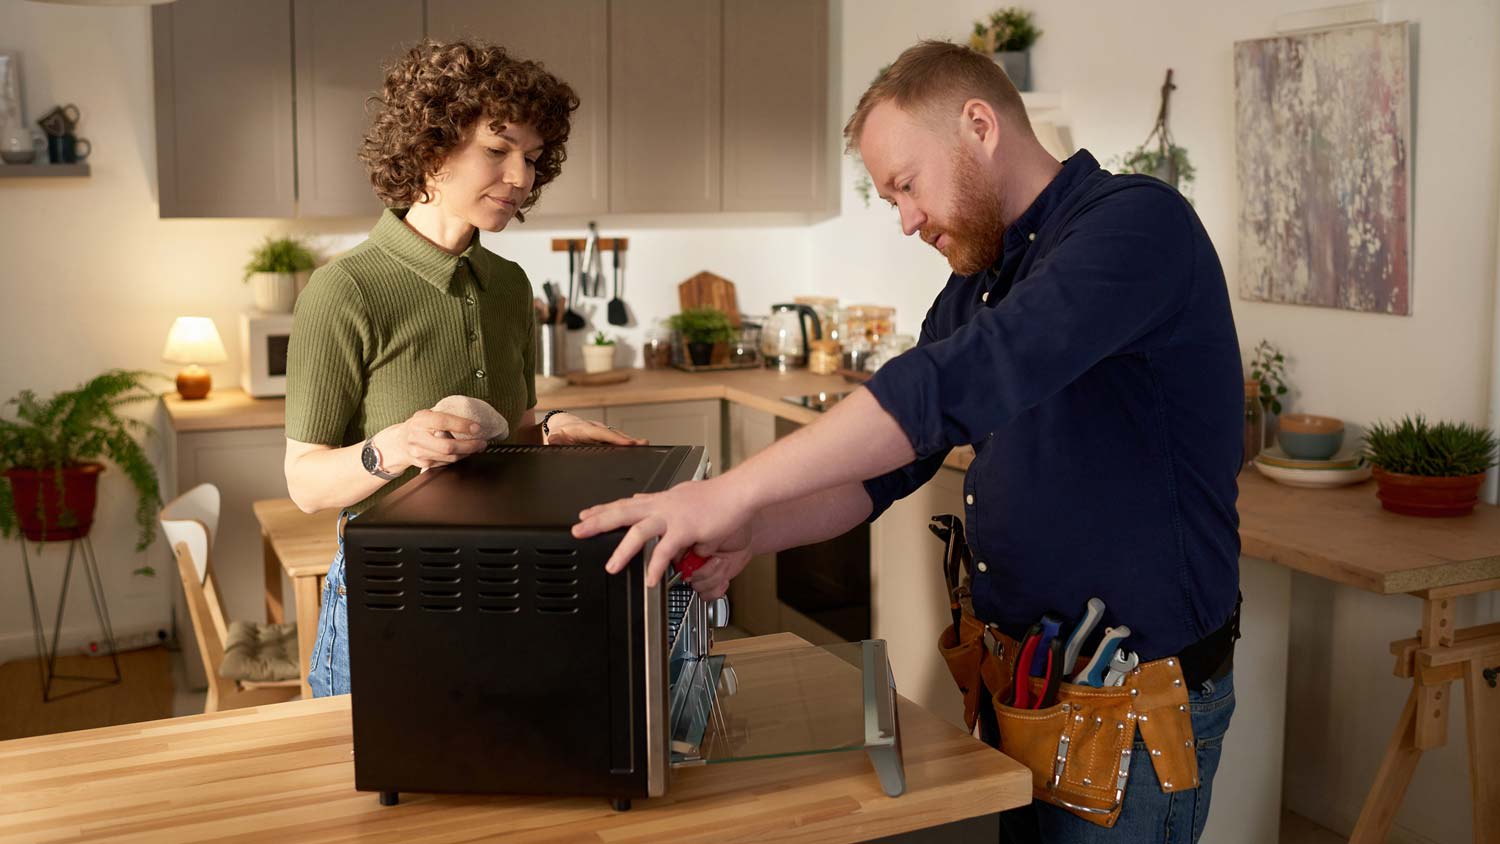
Hiring a local appliance repair professional provides reliable help when you face gas line problems, major electrical work, or refrigerant issues.
So, your dishwasher just stopped mid-cycle, and there’s still soap everywhere. Or maybe your dryer is taking three cycles to dry a single load of beach towels. While it’s common to immediately start worrying about the cost of repairs, some appliance hiccups are easy to troubleshoot and resolve. Here are some appliance repair tips to keep in mind before you schedule an appointment with a pro.
Checking the owner’s manual should be your first line of attack. It contains troubleshooting steps written specifically for your model and safety warnings to be mindful of. Can’t find yours? Check the manufacturer’s website. Many companies post manuals going back several years, and you’ll need your model number anyway if parts have to be replaced.
Before tackling any further steps, peek behind the appliance and make sure it’s plugged in properly. It’s possible the plug loosened in the socket or someone hit the wrong switch on a power strip. While you’re back there, check that the plug isn’t damaged or the wires aren’t frayed.
Be sure to check your circuit breaker too—sometimes, they trip for no obvious reason. Also, test the outlet with another device to ensure it’s working properly. For gas appliances, make sure the valve didn’t get switched to “off.”

It’s easy to overlook how many appliances have filters and how often to clean them. Dishwashers, refrigerators, dryers, and air conditioners see heavy usage, so they need routine maintenance. Follow these general cleaning guidelines:
Dryer lint trap: After each load
Dishwasher filter: Every month
Washing machine drain filter: Every one to three months
HVAC filter: Every one to three months
Range hood filter: Every month if you frequently cook, otherwise every two to three months
Refrigerator water filter: Every six months, or as soon as the fridge’s control panel alerts you
Clogged filters cause many appliance issues and can make appliances work harder than necessary. Set reminders on your phone so you never skip a maintenance cleaning.
While you don’t need a whole workshop, it’s best to have some basic tools on hand so you can quickly troubleshoot issues and potentially save some money down the line. Pick up a set of screwdrivers that fit the different screws on your appliances, needle-nose pliers, and a flashlight. A multimeter is also useful: It’ll tell you if electricity is getting where it’s supposed to go, eliminating a lot of guesswork.
No matter what appliance you’re trying to repair, always prioritize safety. Unplug the appliance or turn the breaker off before you start troubleshooting any issues. The same goes for gas appliances: Always turn off the gas.
Even after you turn off the appliance's electricity, wait a few minutes before you touch anything electrical. Some components store electricity even when disconnected, so give them some time to “cool off.”

Your fridge has coils either on the back or underneath the front panel. These coils are essentially magnets for dust and pet hair. When they’re dirty, your fridge will work overtime, so you can expect a higher electricity bill. If the coils are on the back of the fridge, you’ll need to pull it out to reach them. Otherwise, you may have to unclip a panel on the front to clean the coils. Vacuum or brush the coils off every few months.
Before you order a new heating element, motor, or any other component for an appliance, test the old one with a multimeter. Most “broken” parts are just disconnected or dirty. So many people replace perfectly good thermostats because they didn’t realize the wire had just wiggled loose.
Keep a small stash of common replacement parts for your appliances, such as water filters, drive belts, and gaskets—anything that wears out regularly. This way, you’ll be able to repair an appliance quickly without having to wait for parts to be delivered.
Start a simple log of what breaks, when it breaks, and what you did about it. Even though that might sound a bit tedious, you may notice that patterns emerge. Maybe your dishwasher clogs every three months because someone doesn’t rinse plates properly. Or perhaps the washing machine belt keeps slipping because the machine isn’t level.
Keeping track helps you spot recurring issues before they become major headaches. And if repairs are frequently needed, that can be a good indicator of when it’s time to replace the appliance entirely.

Some repairs are DIY-friendly, but others are absolutely not. Gas line problems, major electrical work, and anything involving refrigerant should be left to the pros to handle. If you’re not comfortable with a repair or you’ve run through the list of basic troubleshooting steps, reach out to a local appliance repair professional for a quote. Most appliance repairs cost about $100 to $250, with many pros charging between $50 and $150 per hour for labor.
Positive experience. As previously stated, the replacement/repair could not be completed (no fault of the plumbing tech) b/c misinformation was rec?d by property management maintenance. Thanks to the plumbing tech for your efforts. Appreciate you!
 The Waterworks
Carpet repair done well. Scheduling was easy. Showed up on time.
As usual with ECO, tech Jordan was outstanding, very professional, very knowledgeable, and very thorough with repairs made to tankless water heaters. Very highly recommend ECO!!!
 Eco Plumbers, Electricians, and HVAC Technicians
I would recommend this company to anyone! He showed up on time, was friendly, completed a very difficult repair on our dryer vent cover, was responsive, and pricing was extremely fair and competitive. I would have him back to do any of our repairs or cleanings without hesitation!
Everything from initial contact to completion was absolutely top notch. We contacted the business during off hours to leave a message, and the owner still reached out to feel out the issue within minutes. We were scheduled and repaired within 48 hours. I cannot say enough about the...
 Supreme brick & chimney
Ace Fireplace Services came to the rescue for my chimney repair. They were quick to pinpoint the issue and worked their magic to fix it. My chimney is now in excellent shape, and I'm a satisfied customer.
 Ace Fireplace Services
On Sunday 2/26 I requested quotes via Angi from 4 refrigerator repair businesses. Northwest Appliance responded to me Monday morning (2/27) and my refrigerator was repaired by noon the same day. Great communication, they did everything they said they would. The technician had the parts on...
Excellent! We were very satisfied with the service provided and the entire experience from start to finish. Very friendly and professional staff. I was able to instantly get in contact with them for a quote and the response time and overall communication remained quick and easy throughout the...
 Prime Cleaning Service
Description says they handle window repair including rotten hardwood - they called me back right away but didnâ t leave a voicemail. I followed up 3 days later and they said they donâ t do that kind of work.
I needed reliable, affordable help the day of with moving a couple of appliances and misc items. It was a relief to hear back from Tanzillo almost instantly that morning so I could stop looking and move on to plan and prepare. Every part of the move was friendly and professional. Next time I...
From average costs to expert advice, get all the answers you need to get your job done.
If your dated appliances don't impress, it's time for a refresh. We break down the cost to refinish appliances, including ovens, refrigerators, washers, and more.

Explore the common types of oven repairs and how much they cost based on the problem, the part, and the type of oven. This guide will tell you the average cost to repair an oven.
Get transparent microwave repair cost info for 2026. Learn what impacts price, compare repair vs. replacement, and find ways to save on your microwave repair.

When a major appliance in your home breaks down and needs repairs, it can be a major headache to find the right appliance repair service for the job. Our tips help make finding the right pro a breeze.

Deciding whether to repair or replace appliances depends on many factors, including their age. Learn when it makes sense to repair versus replace a home appliance.

Knowing how to extend the life of your home appliances can keep them operating for years and can save you a lot of money. This guide will walk you through what to do so you won’t have to replace your appliances prematurely.