

•
Get transparent furniture refinishing cost information and learn average prices, cost factors, and ways to save before hiring a pro and starting your project.
Good wood deserves a second chance

The best refinishing tips start with knowing your wood type, as oak and ash take stain well while pine or maple need conditioner to prevent blotching.
You'll want to work in a well-ventilated space with open windows or fans to clear fumes from strippers, paints, and sealants while protecting yourself with a mask.
Your furniture refinishing project needs thorough sanding with medium-grit to fine-grit sandpaper, always working with the grain to avoid scratches and ensure a smooth finish.
Hiring a local furniture refinishing professional removes the guesswork from stripping, staining, and sealing, especially when working with antique or delicate pieces that need expert care.
Refinishing an old dresser, table, or chair can be a rewarding way to give new life to a worn or dated piece. But knowing where to begin can feel overwhelming. From identifying the type of wood to sealing and curing your final finish, these tips for refinishing furniture will give you the confidence to take on your next DIY project.
Wood types absorb stains and finishes differently. Oak and ash, for example, take stain well, while pine or maple can blotch without a conditioner. When you know the wood type, you're better equipped to choose the right products for the project and anticipate the final result. If you have refinishing furniture questions based on the type of wood, consult with your local furniture refinishing company to maintain the integrity of your piece.

When refinishing furniture, you'll be exposed to strong fumes from strippers, paints, and sealants, as well as dust from sanding. Completing your project in a well-ventilated workspace is essential for safety and comfort. A garage with the door open, a covered patio, or an indoor room with open windows and fans helps clear the air. It's also a good idea to wear a mask and safety goggles to further protect yourself.
Even if a piece looks relatively clean, years of dust, grease, and furniture polish can build up in cracks and crevices. This can prevent the finishing from adhering properly. A mild degreasing cleaner or a mixture of warm water and dish soap can do the trick, but make sure the furniture is completely dry before you continue with the project.
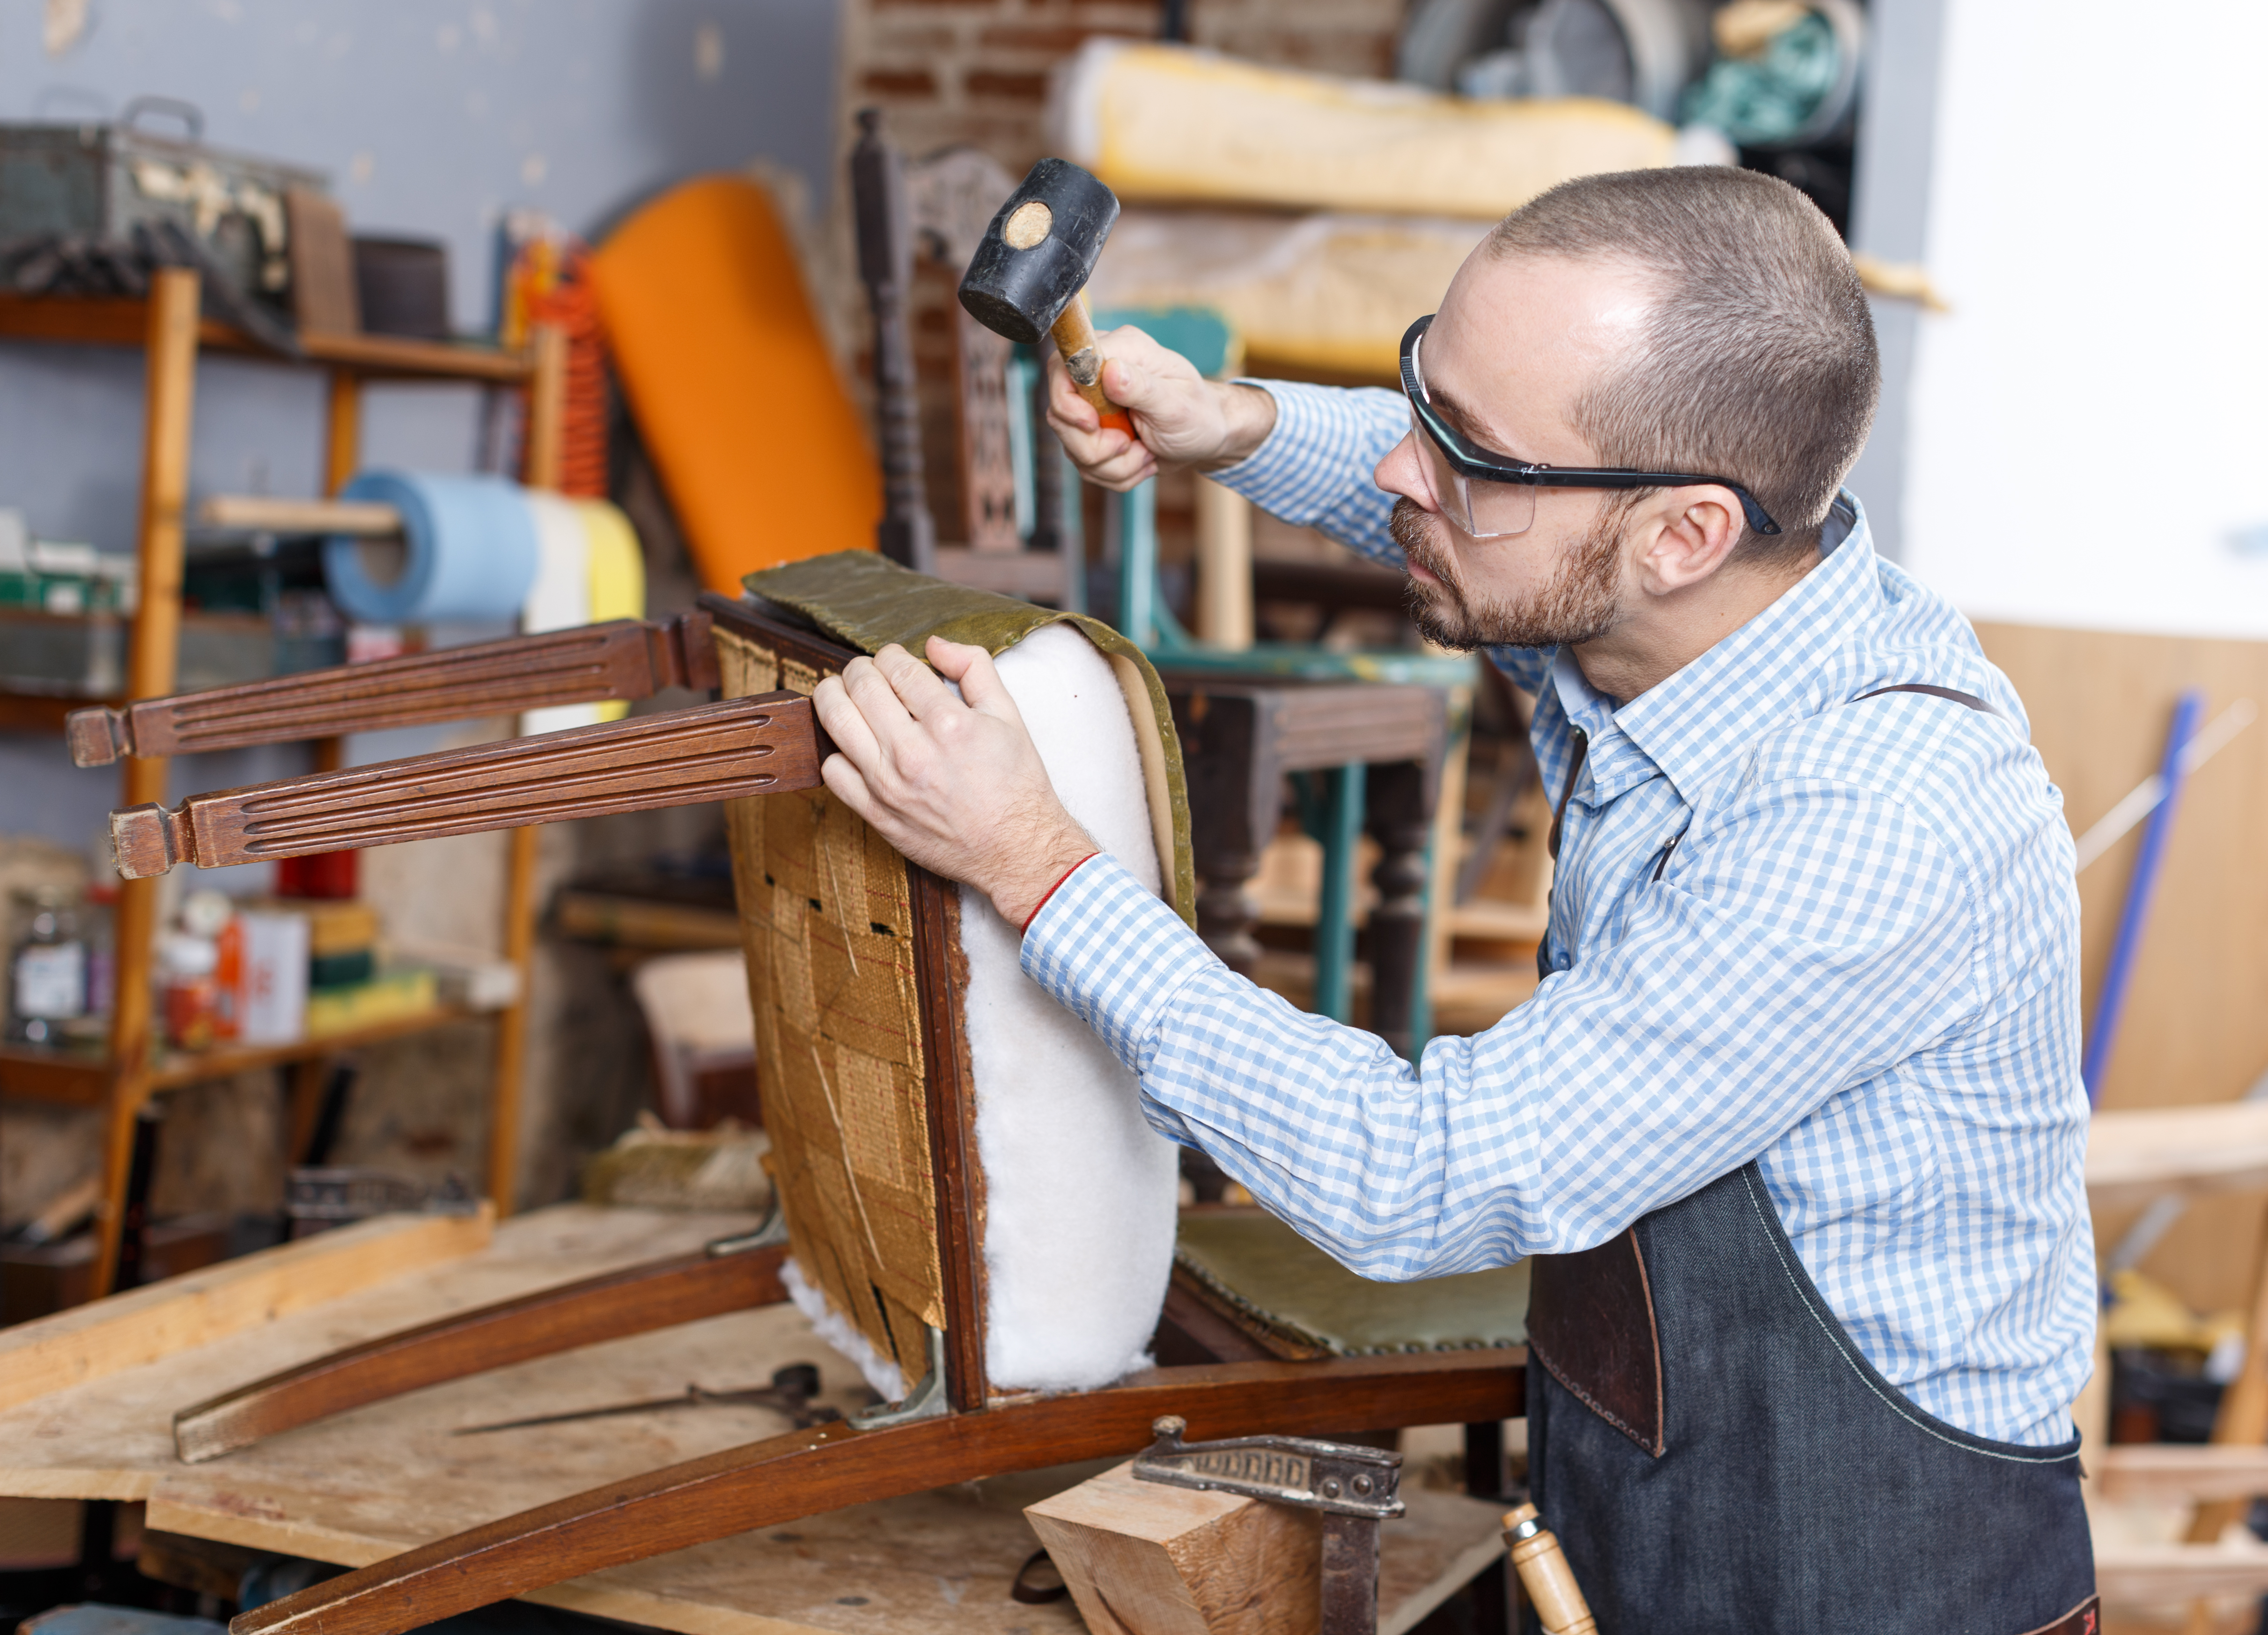
Look for any damage like loose joints, missing veneer, or deep scratches. Wood glue can handle wobbly legs or frames, while wood filler works well for dents and chips. Tackle these repairs before sanding or finishing for a polished final look that lasts. If the damage is extensive, you'll want to evaluate whether it's a restore or refinish furniture project.

If your furniture has any knobs, handles, hinges, or drawer pulls, take them off before you start sanding or stripping. This protects the hardware from damage and allows you to get into all the nooks and corners without obstruction. Keep the hardware and screws in a labeled bag or container so you’re not scrambling to find them when it’s time to put everything back together.
Stripping the old finish is one of the most labor-intensive steps, but it’s the best way to reveal the natural grain and prep the surface. Chemical strippers are the quickest method and come in liquid, spray, or gel form. Apply a thick, even layer to a small section at a time, let it sit, then scrape with a putty knife. Steel wool is great for stubborn areas, but you may need to repeat the process to get it fully removed. Patience is one of the best tips for refinishing antique furniture, as it can take a delicate hand to strip away aged finish.
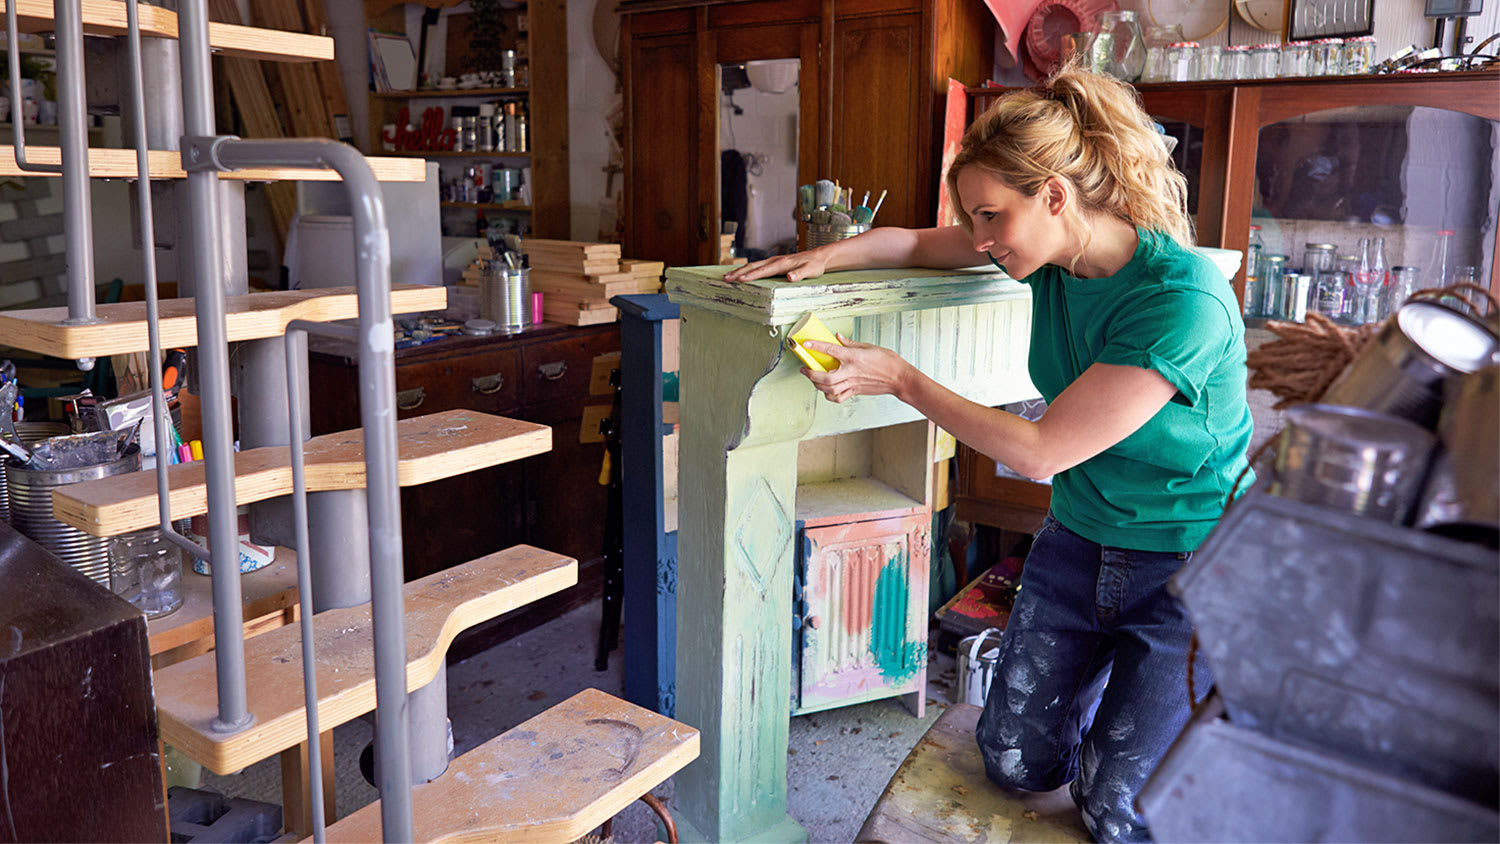
Sanding is what truly sets the stage for a smooth finish. Start with a medium-grit sandpaper to remove any remaining finish, then work your way to a finer grit for a polished surface. Always sand with the grain to avoid scratches. And while it may feel tedious, taking your time here pays off big. Uneven or rushed sanding can cause blotchy staining or rough texture.

Do a test run with your chosen stain or paint on a hidden area like the underside or back. Wood can react unpredictably to different finishes, and colors can appear different on wood than they do in the can. A quick test can save you from a full redo and give you a chance to make adjustments before moving forward.
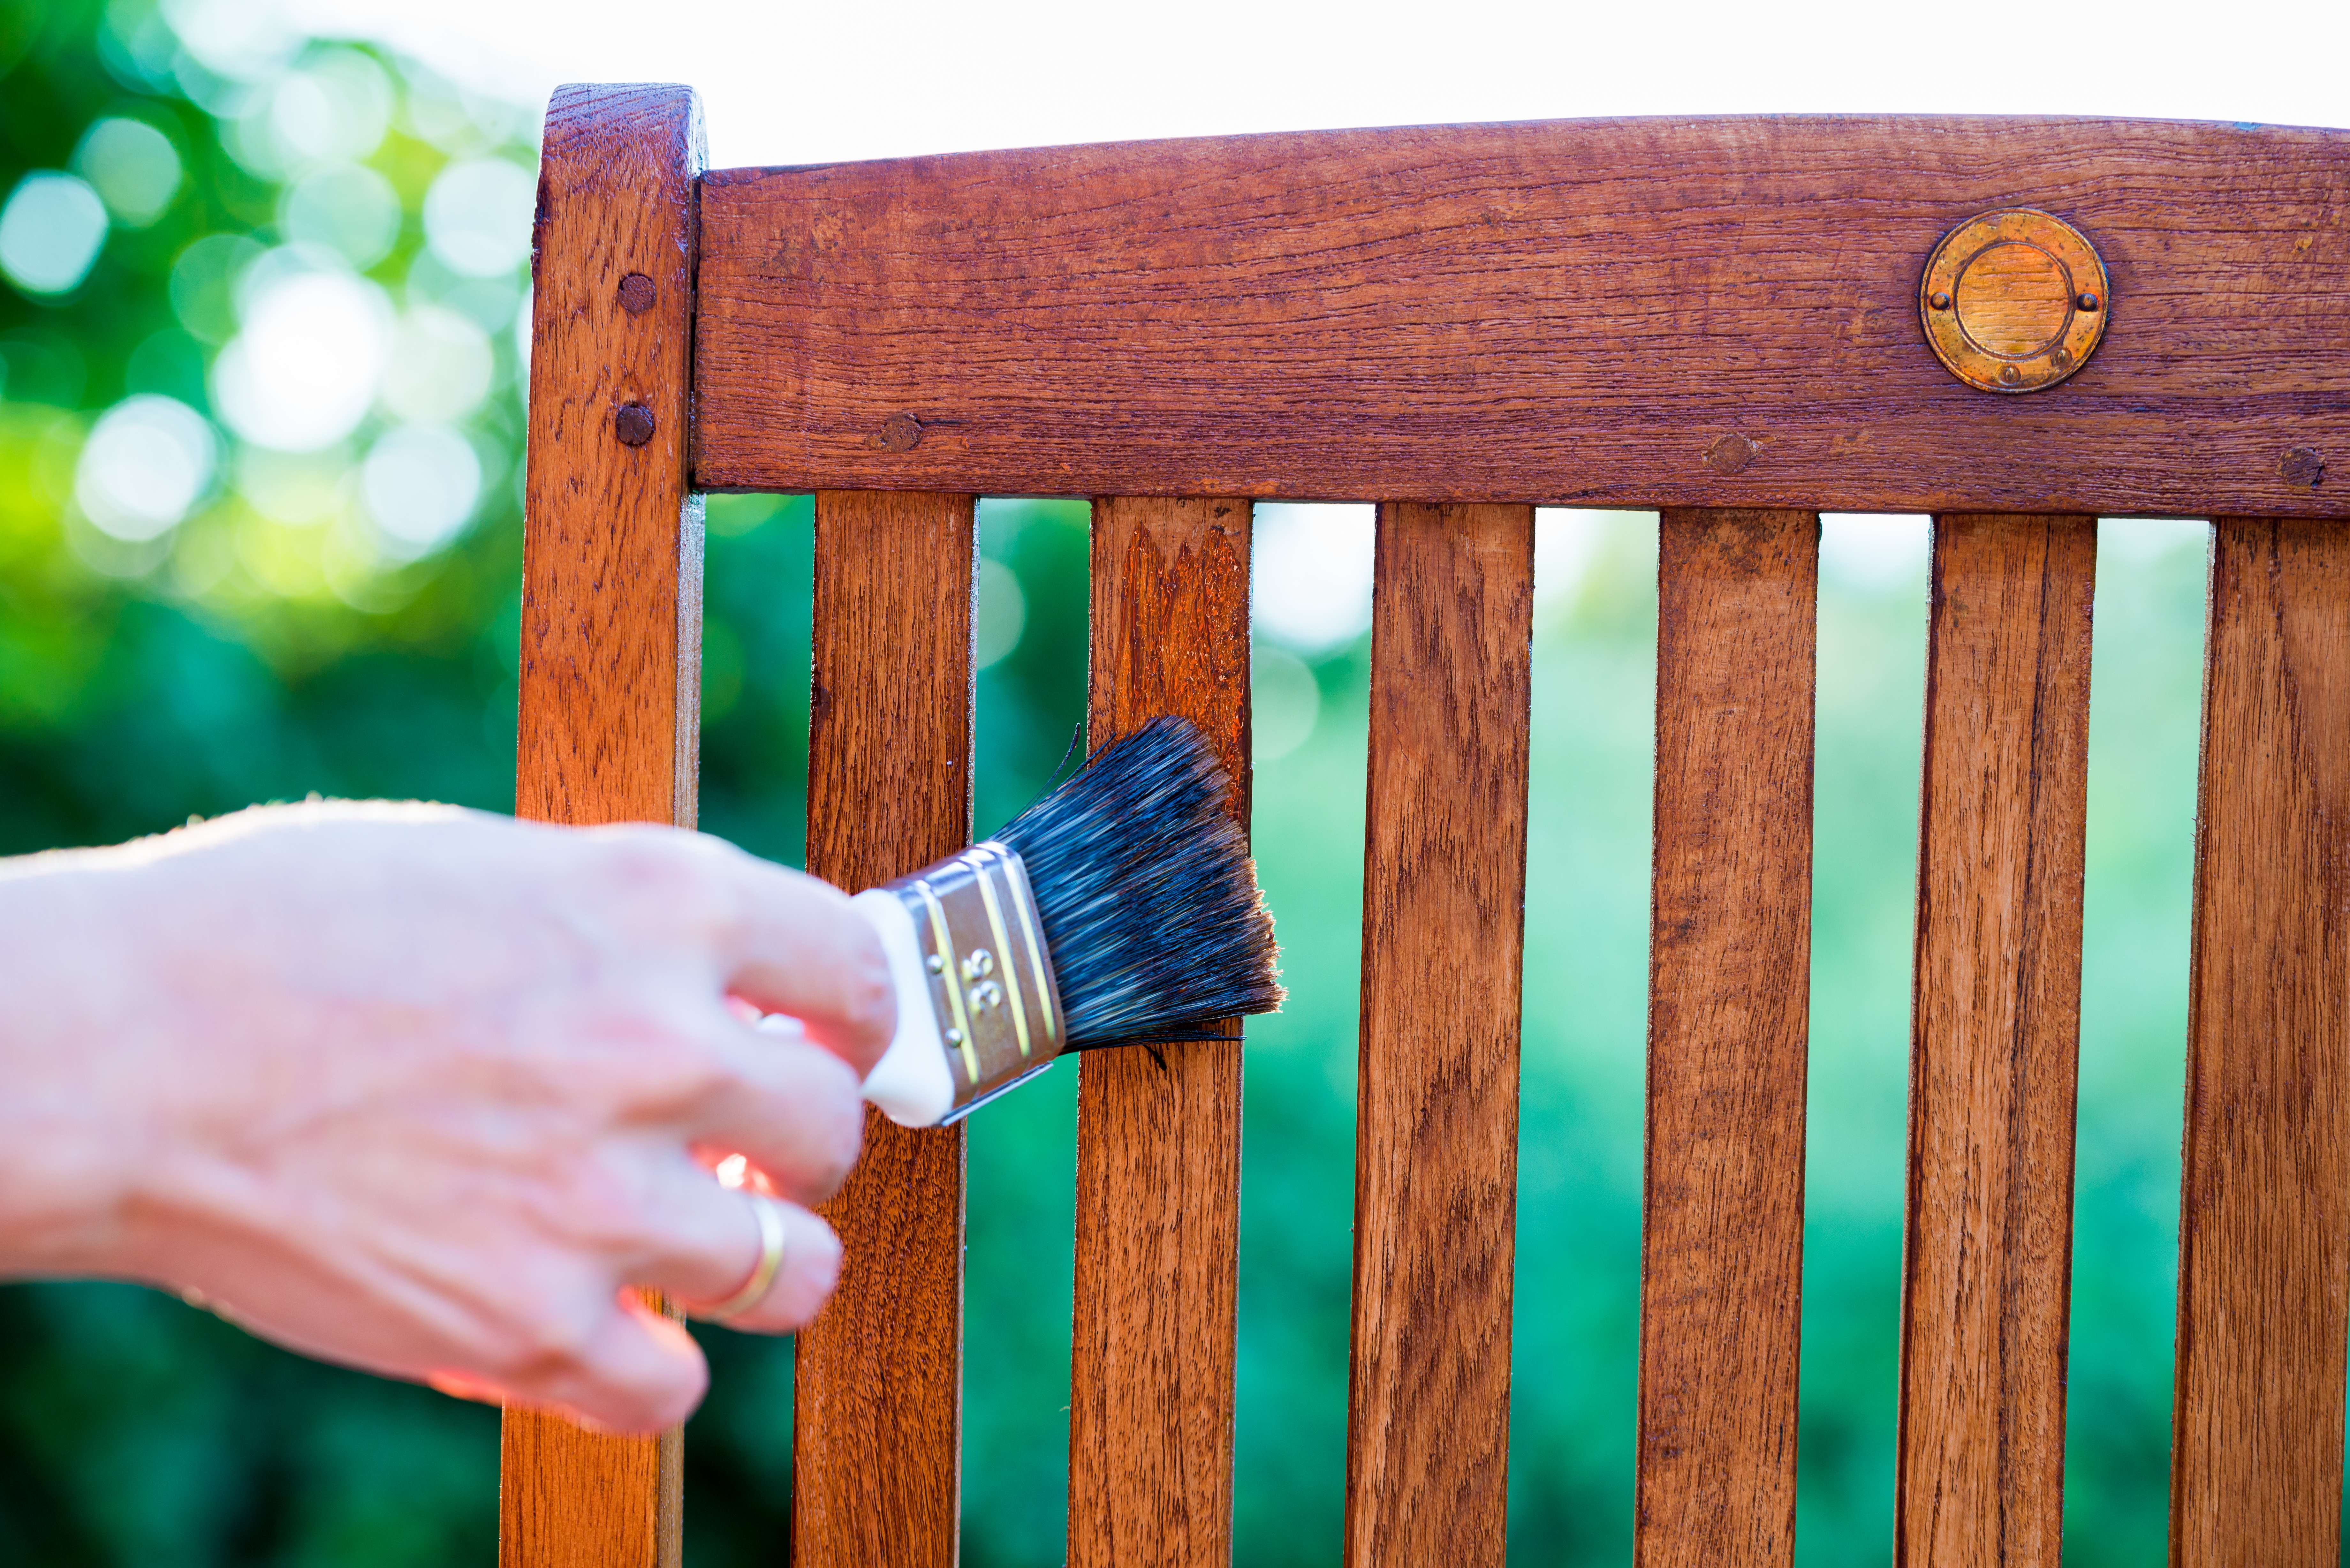
Once your stain or paint is dry, add a protective topcoat to lock in the final look and protect the piece from scratches, spills, and general wear. Choose a polyurethane, wax, or oil-based sealant that complements your finish.
Even after your piece feels dry to the touch, it needs time to fully cure. This is the period when the finish hardens and bonds to the surface, making it more durable. Curing can take a few days to a couple of weeks, depending on the product. Be patient and hold off on using the piece until it’s fully cured to avoid smudges, dents, or sticky surfaces.
Showed up on time and cleaned carpets well, but didn?t move furniture.
My kitchen cabinets look brand new thanks to Custom Paint Jobs LLC. Their refinishing is exceptional.
Couldn't have been a worse experience. 3 of my belongings were lost and 5 belongings were damaged. My furniture was clearly dragged across the ground. The movers couldn't move the furniture I paid extra heavy weight fees for so I had to help them move my own furniture. The manager gave me...
 US Interstate and Rail
SOOOOOOO SHADY!!! We were quoted a max of $500 for 2- one bedroom apartments in the same complex moving to a two bedroom apartment 10 minutes away. The only large furniture that would be moved were 2 beds, 1 dresser, and a couch (very minimal heavy lifting). The movers showed up and joked...
 All My Sons Moving & Storage
Just moved from PA to Columbus in a studio apartment and needed help with some heavy furnitures because I couldn't do it alone. I called Hyremovers and they did a great and timely job and also left my apartment walls intact. Great service!
We ordered our bedroom furniture online in March with expected delivery in early April. 2 days before our delivery we received notice that the delivery would be delayed 2 weeks. We were very understanding and had no complaints. Again, 2 days before our new delivery date we received a notice...
Went well overall! The two downsides were 1) they only provided 2 of the 3 men promised and 2). the office guy who surveyed our apartment prior to the move underestimated the amount of stuff we had so the truck was too small. This meant the moving day lasted a bit longer than anticipated....
 Mr. Mover of Ohio Inc
I would absolutely recommend this business. They offer a variety of services, including: painting, roofing, and refinishing wood flooring. I hired them to refinish the original hardwood flooring in my home built in 1874. The job was quite challenging, as the floors were extremely aged and...
Removed various items (furniture, lamps, other junk) from my home. They were on time, personable, professional, etc. I can't say enough positive things about this company. <br />
Leaders does a very professional and affordable job. They were reliable and the movers treated our furniture like their own. I have used them twice, and I have recommended them to others. You can't find a better moving company in Columbus. <br />
From average costs to expert advice, get all the answers you need to get your job done.
Get transparent furniture refinishing cost information and learn average prices, cost factors, and ways to save before hiring a pro and starting your project.
Discover average furniture repair cost, key price factors, and ways to save. Get expert tips to budget for your next furniture repair project.

Wondering how much it costs to refinish a table? Get average prices, cost factors, and tips to help you budget and choose between DIY or hiring a pro.
If you’re looking into refinishing some furniture, here are some common furniture refinishing questions you can expect to discuss with a pro.
Not sure who to hire for furniture refinishing? See which pros to call, who to hire to refinish furniture, and what to expect from the process.
You don’t need to be a pro to restore antique furniture successfully, but the right tools and supplies and a bit of research will give you professional-level results.