
The cost of window glass replacement may vary, but it'll be worth the price once you're taking in the views. Here's how to calculate the cost.
Add privacy or pizazz to your glass doors or windows

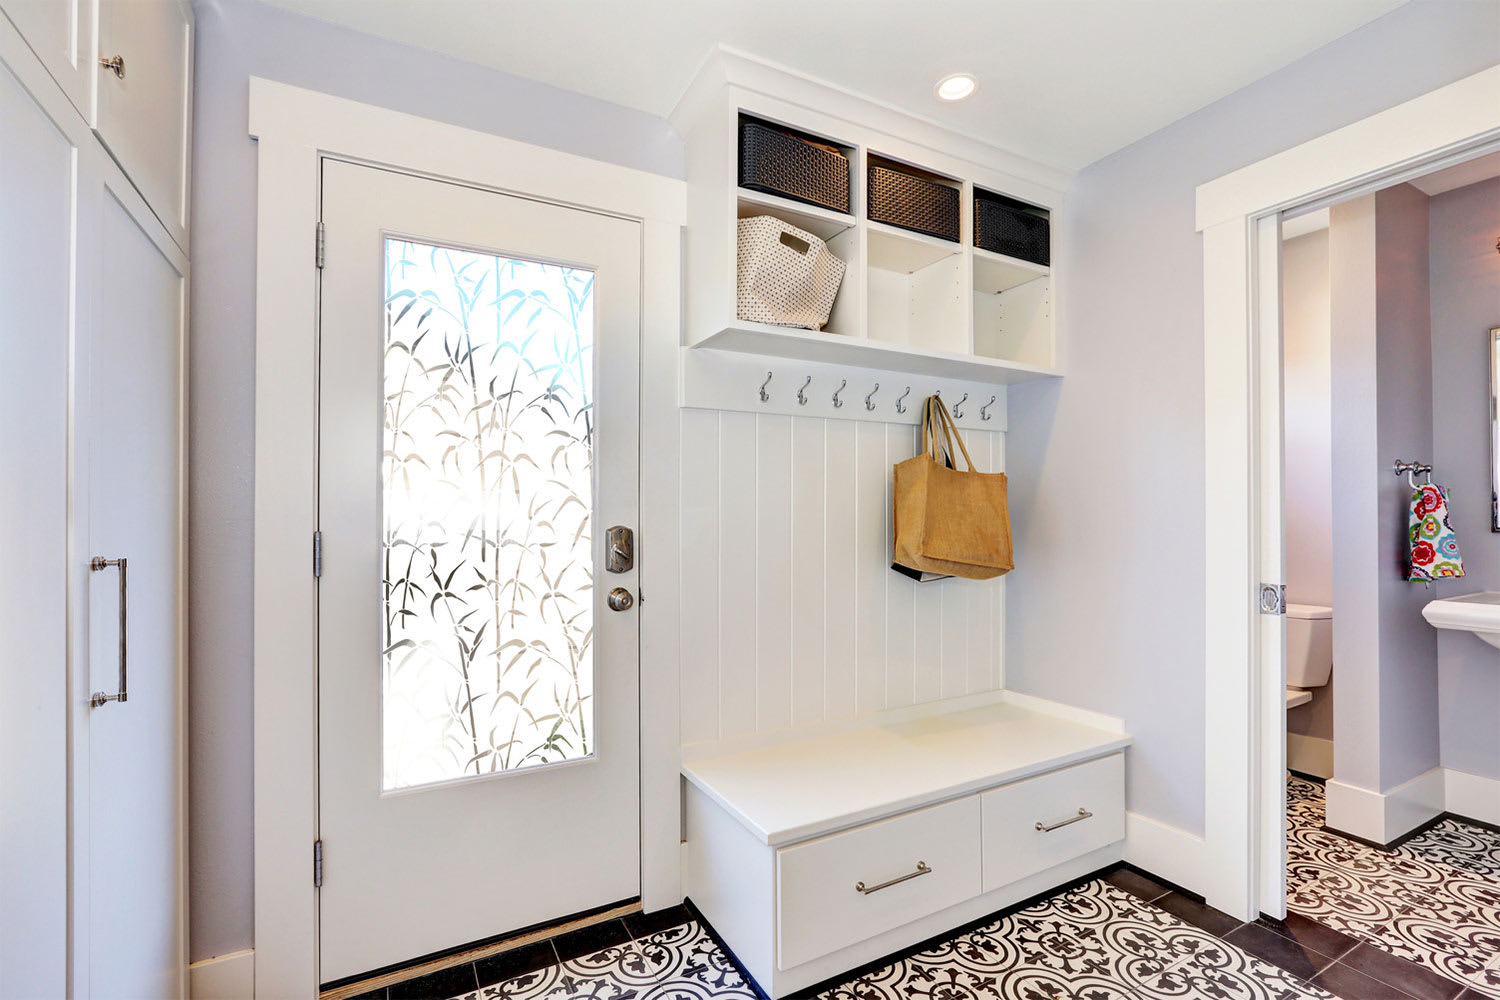
Frosting glass with spray, film, etching cream, or cornstarch creates privacy while keeping your space bright and works well for bathrooms or street-level windows.
Expect to pay $10 to $20 for DIY frosting materials like spray cans, adhesive film, or etching cream to complete your window project affordably.
Clean your glass thoroughly before applying any frosting method, and work in a well-ventilated area when using spray to protect your lungs and eyes.
Hiring a local window company provides expert guidance on frosted glass options and handles large-scale installations where ladders or professional precision are needed.
If you’re looking for a little privacy or just want to add a little flair to your windows, then frosting the glass may be the perfect weekend project. There are a couple of different ways you can go about it, depending on the look you’re going for and your comfort level, but no worries: They’re all a breeze.
Some upgrades make a space look and feel instantly better—like fresh paint, good lighting, or frosted windows. It’s not just about aesthetics, though. Frosted glass offers real, practical benefits without demanding a huge budget or full renovation. Whether you’re sprucing up a bathroom or updating the look of your home office, here’s why frosting your windows is worth it:
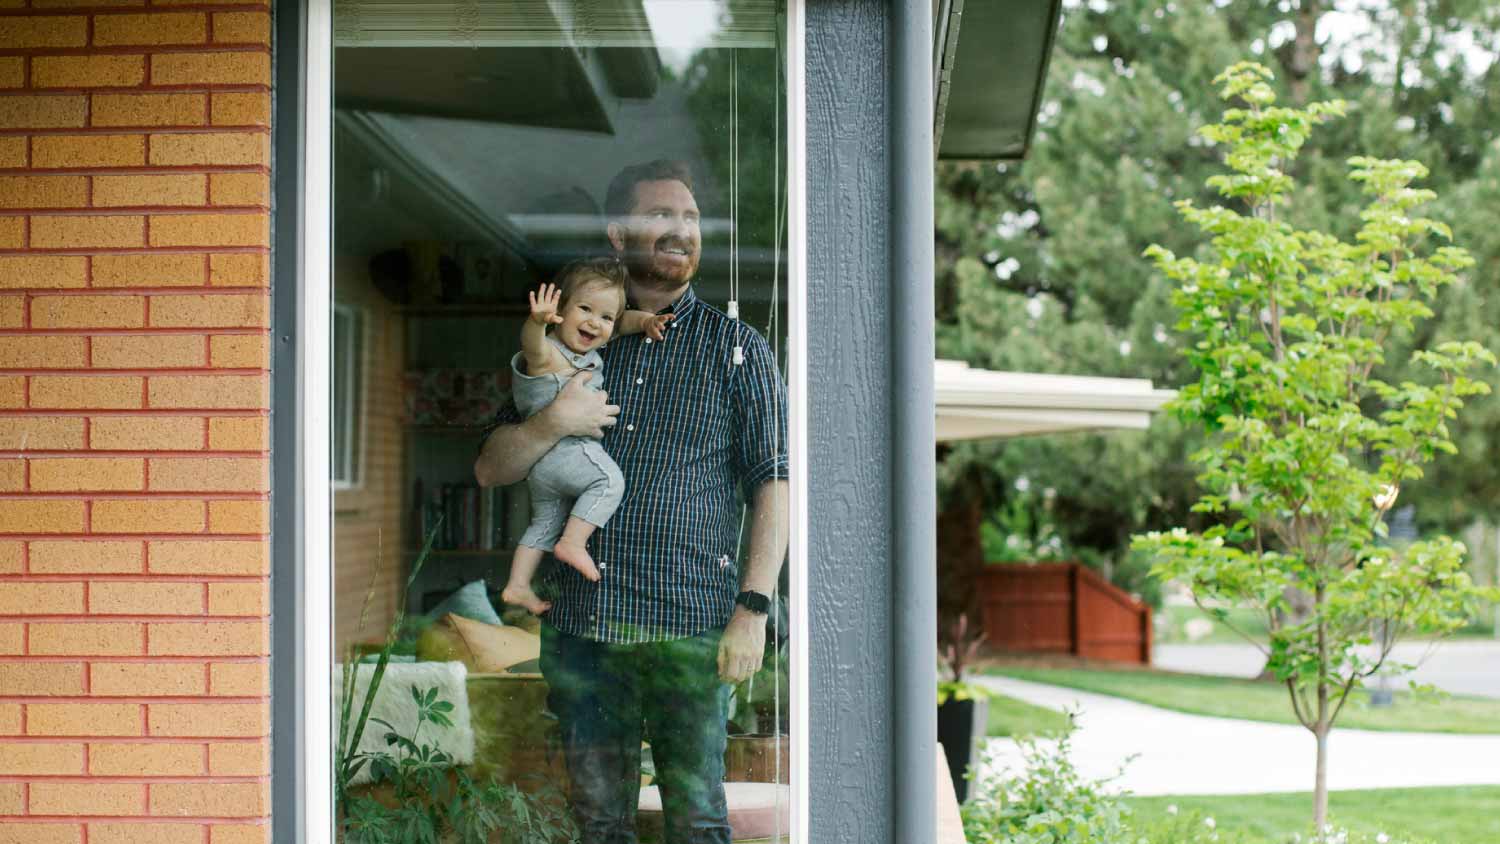
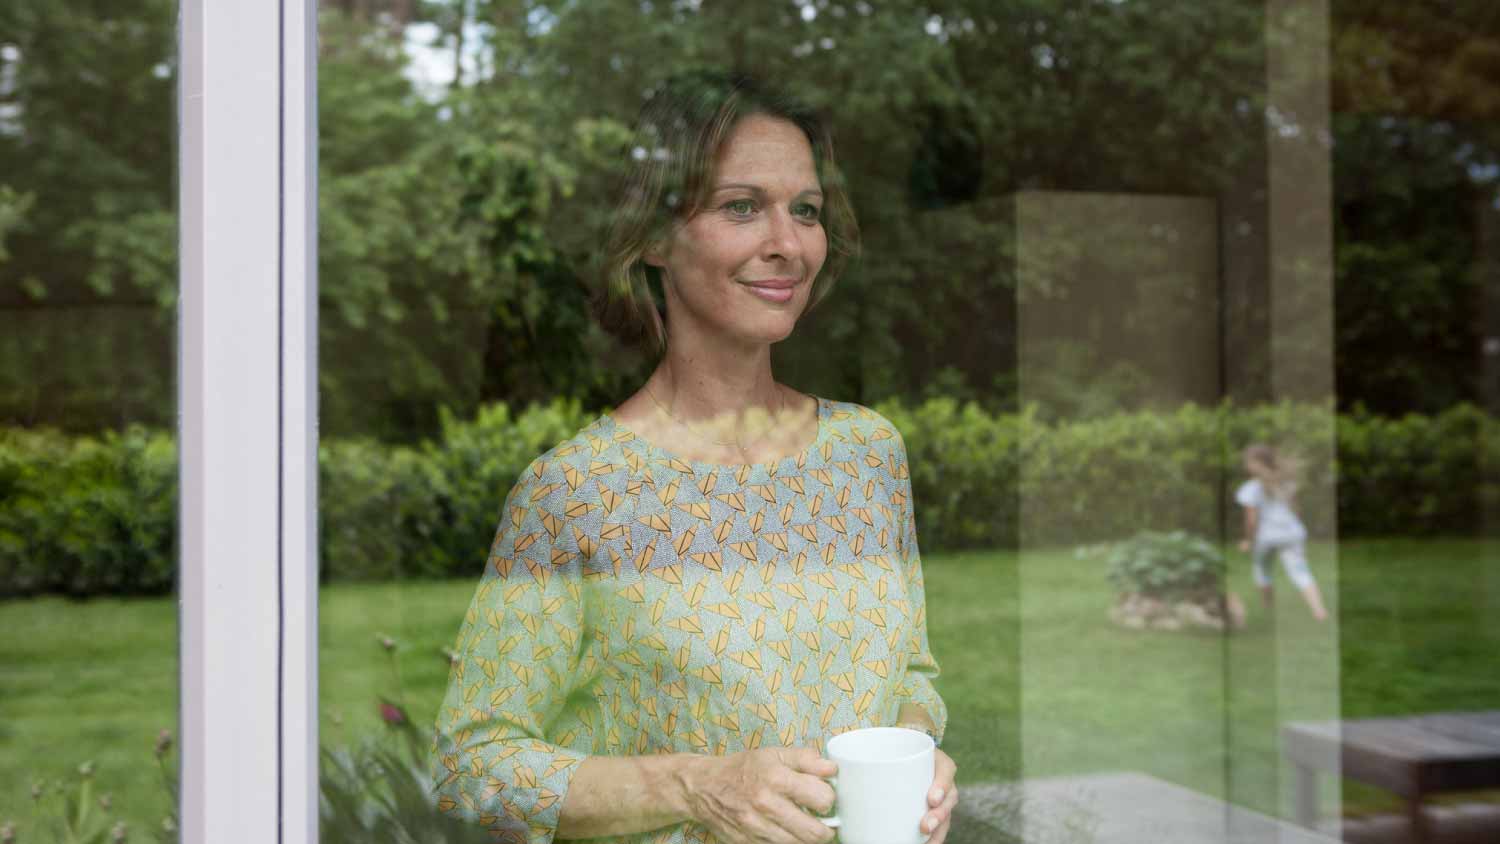
Privacy without sacrificing light: Frosted windows let plenty of natural light in and keep nosy eyes out. They’re perfect for street-level windows and rooms where you don’t want third parties peeking in.
Gentle lighting: Frosted windows help diffuse harsh sunlight so you can avoid the blinding mid-afternoon glare while keeping your space bright. It also helps prevent sun-faded furniture and screen reflections.
Sleek, modern appearance: Frosting has a subtle design edge. Whether you use it in strips, patterns, or entirely on a full pane, it adds a polished look that works with just about any style.
Improved glass safety: Frosting can help people see the glass, especially on big doors or sliding panels. That means fewer people walking face-first into it, especially in busy areas or homes with kids.
Covers up unwanted views: Not every window looks out onto something nice. Frosting can block the view of things like dumpsters or busy roads without making your space feel dark.
Affordable and DIY-friendly: Frosted window film is an inexpensive way to get the look and function of obscured glass without swapping out any panes. It’s a great option for renters or anyone who wants change without the commitment.
You don't need to frost both sides of the glass, which raises the question of which side to frost.
Spray the outside of the glass whenever you can. It’s better for airflow, dries better, and saves you from breathing in the frost spray. But if you’re dealing with a second-story window or a tight space, the inside works just as well. Just crack a window and wear eye protection.
Before anything, clean the glass like you mean it. Dirt, streaks, or lint can mess with the finish, so spray it down, wipe it dry, and—if you’re meticulous—maybe do it twice for good measure. If you’re using a spray or cream, tape off the window frame to keep things tidy.
If you’re choosing a pattern, now’s the time to add a little flair to the windows. Pre-cut stencils are easy to find online or in hardware stores for as little as $10. Spend a few minutes looking through styles to find one that fits your space.
We’ll outline a few methods for frosting glass so you can choose the best one for you. Be sure to consider every method before you go shopping.

Frosted glass spray is one of the easiest ways to frost glass. Once you buy a can (it should run you around $10), give the label a quick read, as each formula will be slightly different. Remember to wear a face mask and keep a fan handy. Never use frosted glass spray in an area with poor ventilation.
Once you’re ready to go, simply spray the window, following the directions on the can. If possible, spray the entirety of the window at once so you can check it after it dries and make any changes.
Good news! It usually takes about five or 10 minutes for frosted glass spray to dry. Clean up and grab a glass of water, then check your work.
Your next option is to apply a frosted glass film over the area you choose. Frosted glass film is available in rolls you can cut with scissors, starting around $10 to $15 per roll, or you can buy one that fits the exact space you need.
Carefully roll your film from top to bottom, using your fingers (or a helping hand) to seal it to dry, clean glass. Go slow to avoid bubbles or uneven sections on your window or door.
Instead of pre-stenciling an area, you might consider just purchasing a pre-designed glass film. Look for companies that make customized designs with business logos, family names, and patterns online.
Spray-on etching cream costs between $10 and $20 at home improvement stores or online and is another great option. Lay a smooth coat over the area and spread it by hand if needed. Read the label on your product to ensure you cover the desired section.
Keep in mind that frosted glass using the cream looks slightly different than the first two methods—you’ll get more of a patterned opaqueness, whereas the adhesive and spray paint look solidly opaque.
Once you’ve applied the cream, wait around five to 10 minutes and check your work.
As surprising as it may sound, cornstarch and tissue paper are another way to get a frosted glass finish. Mix a few tablespoons of cornstarch with warm water until you get a smooth, milky consistency. Brush a thin layer onto the glass, then press on the tissue paper and gently smooth it out. For larger panes, slightly overlap the edges. Once it’s dry, you can brush on a second light coat of the paste to seal it. Trim the edges with a craft knife for a clean look.
The cost to DIY this project is minimal. A box of cornstarch costs about $2 to $10, and you’ll barely put a dent in it, while tissue paper costs around $1 to $5 per pack. Stick with white for the classic frosted look, but colored paper is one way to add a creative touch—it's your call.
If you want to get a perfect finish on your frosted glass, following a few tips is important. For one, you’ll want to select the method that works best for the look you hope to achieve. Sprays tend to be a bit more opaque, and adhesives can allow you to create designs more easily, while creams give you more of a textured look.
Once you choose your preferred glass frosting method, be sure to read all instructions thoroughly and take your time. Be sure to get the glass very clean and dry before you start.

Frosting glass isn't too difficult and is a project most homeowners can likely tackle on their own. However, hiring a local handyperson with experience could also be a good option if the job seems out of your wheelhouse or if you have a few small tasks they can tackle during the same visit. While most glass frosting DIY methods clock in under $20, hiring a handyperson usually costs $60 to $125 per hour, not including materials and travel costs.
Alternatively, a local window replacement specialist can provide information about frosted glass or help select the right patterns for your home. They might also be helpful for large-scale projects, such as applying frosted glass to a commercial building. If climbing on ladders is involved, it's probably worth at least considering hiring a pro.
Excellent, Prompt, Courteous Service!!! They were super friendly and quite personable. I felt very comfortable with the gentlemen that did the installation. They installed it exactly where I asked them to and they did an excellent job!! I loved their service so much.
Ace Fireplace Services' chimney sweep service is truly exceptional. They used advanced technology to ensure a thorough cleaning process, and my chimney has never looked better. I highly recommend their services.
 Ace Fireplace Services
Binion and Alex did such a good job. Fast, fair, efficient. Would def use them again. Best experience Iâ ve had in moving - someone should give them a raise. Will undoubtedly recommend this service.
Great customer service. The owner Ilia was wonderful to work with. Would definitely recommend this company.
I definitely recommend Ramonaâ s cleaning service! I have booked services with her many times and she arrives on time, ready to work and provides a great service.
Excellent experience! Left my place looking great. Friendly customer service too. Would recommend!
The service was excellent! They gave me a quote, and had it done 4 days later. My driveway looks amazing, very professional! I would definitely recommend their service to anyone. I have had neighbors stop by and ask for their information as well.
 All Star Paving and Sealing
Webb â s was priced well, flexible on scheduling, great with communication, and detailed in their work. Iâ ll definitely use their services again.
They’ve been great to work with. All of my clients that have used them have nothing but good things to say about the experience. Quick responses and fast service. They’re a trustworthy team!
 Total Home Roofing
Mary cleaning service does an amazing job cleaning my home. They go over and beyond the cleaning services that I have had in the past. They are very punctual and thorough with cleaning my home, I’m extremely happy with the service they provide and I highly recommend them.
From average costs to expert advice, get all the answers you need to get your job done.
The cost of window glass replacement may vary, but it'll be worth the price once you're taking in the views. Here's how to calculate the cost.
Discover how much you’ll pay for a glass cutting project, exploring key cost factors like the size, type of glass, and project intricacy.

How much does a glass garage door cost? The size, type of glass, and frame material will all impact what you pay.
Window glass needs to be tough to withstand the elements no matter where they are in your home. Here’s how to know which types of window glass to consider for your next project.
Decorative window films are a great way to make a visual impact in your home. Here are 10 stunning ideas for some inspiration for your next DIY project.
A scratched mirror, glass vase, or another treasured item can be unsightly. Luckily, removing glass scratches is fast and easy to DIY. Here are some tips on how to do it.