
The average cost to paint shutters is $350, depending on the size, number of shutters, and labor. Read this guide to learn more about shutter costs.
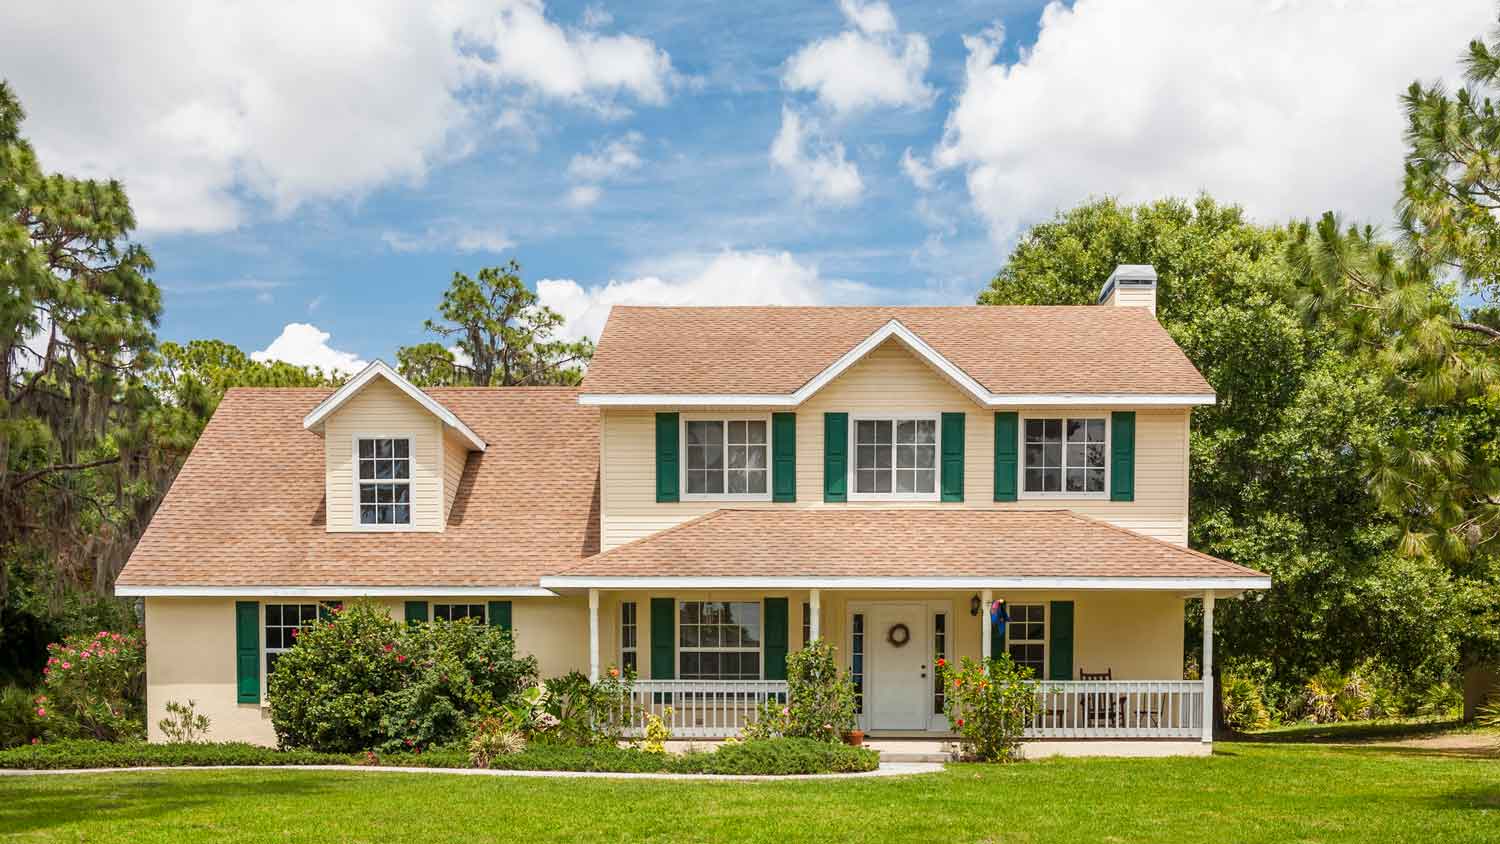
Give your exterior a glow-up with newly painted shutters

Painting vinyl shutters refreshes your home's exterior, and you can complete the project with the shutters still attached to avoid paint transfer to surrounding surfaces.
Expect to pay $200 to $500 for professional shutter painting, while DIY costs range from $150 to $450 depending on the number of shutters.
Your best results come from thoroughly cleaning the shutters, applying a plastic-safe primer, and using latex paint designed specifically for exterior vinyl surfaces.
Hiring a local exterior painting professional keeps you safe off ladders and ensures proper paint selection for your climate, especially for shutters on multiple floors.
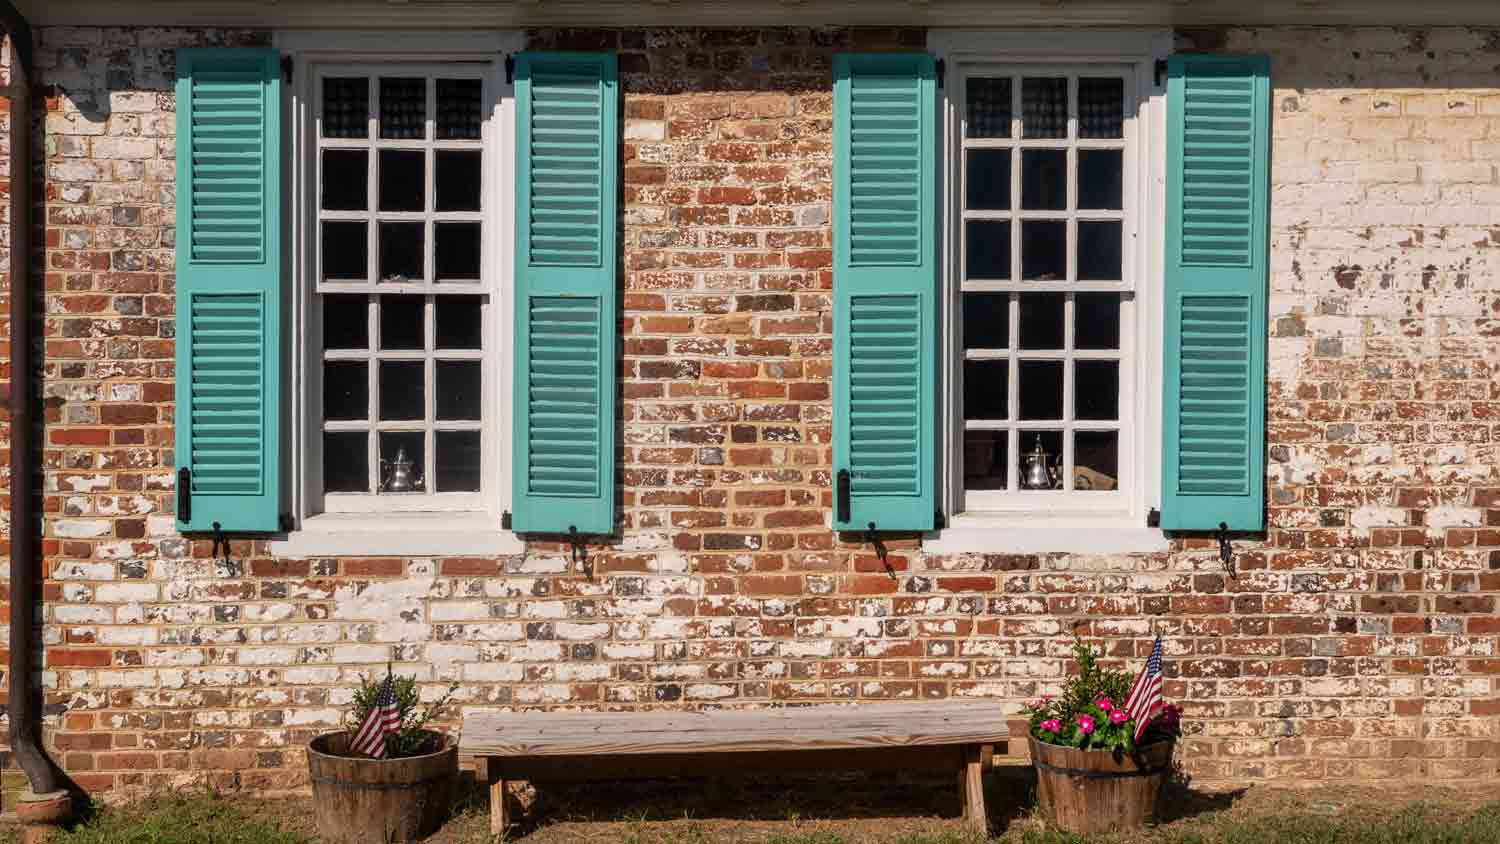
There’s no better way to give your exterior a facelift than by painting your shutters. Over time, shutters can start to fade or peel. And if you went for a trendy color 10 years ago, it might be time for an update.
The good news is that a project like this is relatively simple to DIY and will only take about a weekend to complete. Follow this guide to find out exactly how to paint shutters, no matter what material they’re made of.

There’s no need to remove wood shutters from the house if they open and close functionally. However, if they are flush with the house, you may wish to remove them to protect surrounding surfaces like hinges, window frames, and house siding.
Cleaning the shutters is an essential part of the prep. Wash thoroughly with soapy water or use a power washer to remove dirt, dust, and grease. Let the shutters dry completely before proceeding to the next step.
Once dry, apply painter's tape to mask off areas you want to protect from paint, such as window frames and hardware, if the shutters are still in place. Ensure the tape adheres firmly to prevent paint bleed. Put a drop cloth on the ground to capture spills and drips. If you plan to paint indoors, work in a well-ventilated area to avoid inhaling fumes.
Sanding creates a slightly roughened texture on the shutter's surface, which helps the paint stick better. It will also smooth out any rough or uneven areas eliminating imperfections like old paint drips, raised wood grain, or minor damage, resulting in a smoother finish.
Begin sanding by hand or use a palm sander, moving the sandpaper toward the wood grain. Apply even pressure, but don't press too hard to avoid damaging the surface.
Periodically stop and inspect the shutter's surface for smoothness. You want to create a slightly rough texture. Remove the dust with a clean, damp cloth. Ensure the surface is clean and dry before proceeding with priming or painting.
Stir the primer thoroughly using a stirring stick or drill with a paint stirrer attachment to ensure it's well mixed. Pour a small amount of primer into a paint tray. Dip your paintbrush or roller into the primer and coat it evenly.
Apply primer to all the shutter’s surfaces, including the flat areas, edges, and detailed or recessed sections. Pay close attention to corners and crevices to ensure complete coverage. Afterward, let the primer dry according to the manufacturer's instructions—a few hours or up to a full day.
Apply the paint in even, long strokes, following the direction of the wood grain. If using a roller, apply the paint in a vertical motion. Work swiftly but precisely to avoid visible brush or roller marks as the paint dries. Aim for consistent coverage, applied evenly, covering all surfaces, including recessed or detailed areas.
Let the paint set per the manufacturer's recommended drying time. Avoid contact with the painted surface while it dries to prevent smudges or imperfections.
If there are imperfections or rough areas on the surface after the first coat, lightly sand them and wipe away dust with a clean cloth.
Next, dip your brush or roller into the paint, ensuring it's evenly coated but not overly saturated. Apply the second coat of paint, following the same technique as before. Pay special attention to uneven or lighter areas after the first coat. The second coat should provide better coverage. Allow the second coat to dry completely.
After the second coat has dried, inspect the shutters for imperfections or areas that still need improvement. If you notice rough spots or unevenness, lightly sand them and wipe away dust.
You may not need a third coat if the second coat has achieved the desired coverage and finish. However, if you want to enhance the color further or ensure a flawless appearance, apply a third coat following the same steps.
Home improvement stores carry various oil- and water-based paints (also known as latex paint). Oil-based paints are the best paints for outdoor use; they are more durable than latex and adhere easily to wooden surfaces.
Water-based paints, on the other hand, are less likely to peel if the surface becomes damaged and dry more quickly than oil-based paints. Either will work fine for this project.

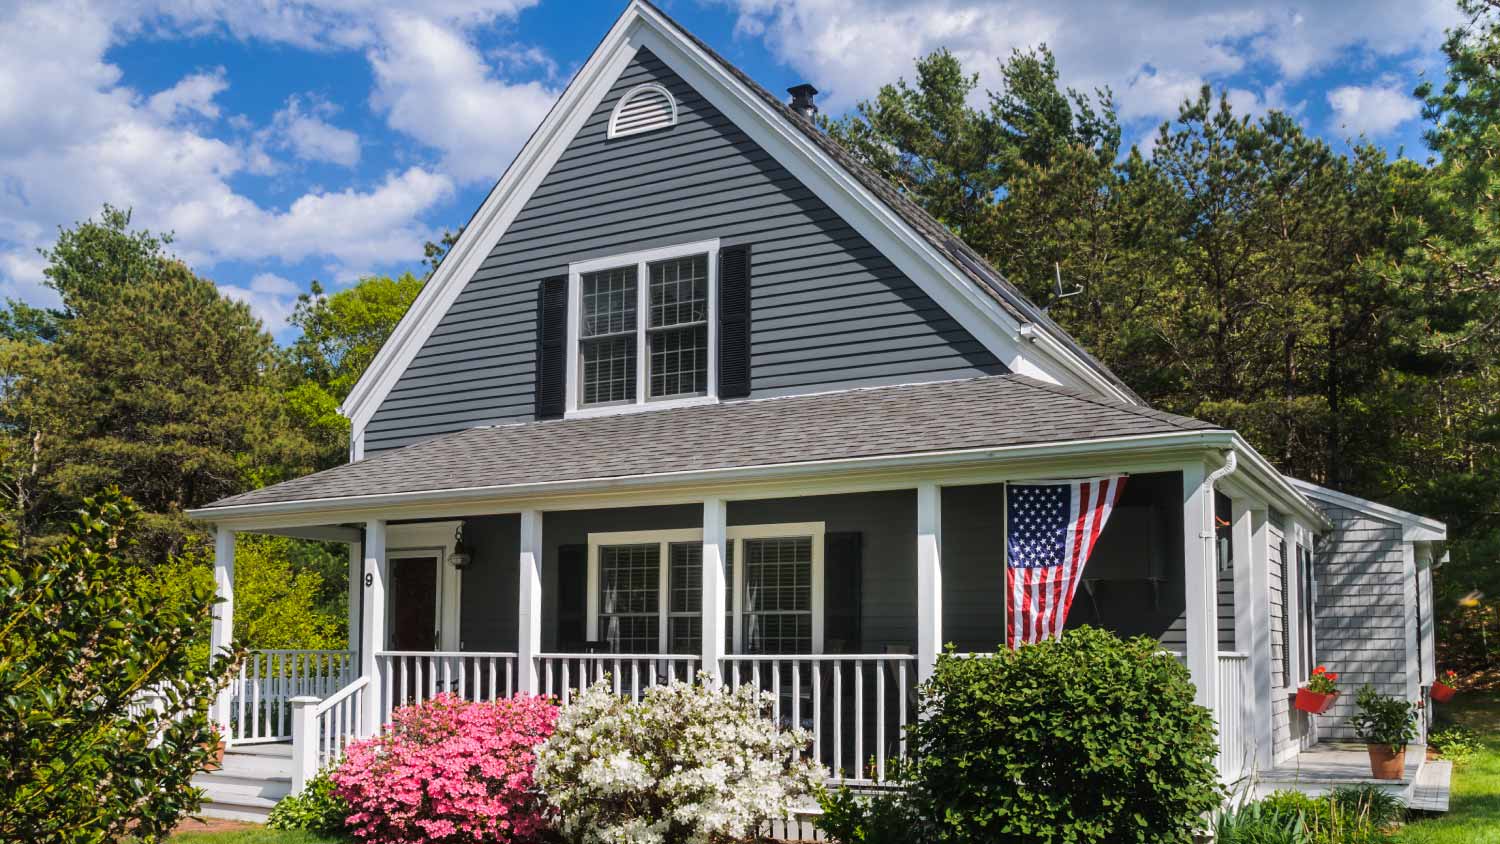
Vinyl shutters have grown in popularity over the last several years due to their durability and ease of care. But they do need touch-ups every once in a while. You can paint your vinyl shutters while they are attached to the house or remove them if you want to avoid paint transfer to your siding or windows.
Before painting, thoroughly clean the vinyl shutters to eliminate dirt, dust, and residue buildup. You can achieve this by using soapy water or a power washer for a comprehensive clean. Ensure that the shutters are completely dry before proceeding with the painting process.
Apply painter's tape as a protective barrier to safeguard areas like window frames and hardware from paint. Then, place a drop cloth on the ground underneath the shutters to catch any potential paint spills or drips.
Unlike wood, sanding vinyl shutters before painting is not necessary. Vinyl is a smooth and non-porous material that doesn't readily accept paint like wood or other porous surfaces, and it doesn't have grain or imperfections that need smoothing or leveling.
Priming isn’t always necessary if the shutters are in good condition. However, priming boosts adhesion and allows better coverage when applying the top coat. Thoroughly mix the primer to ensure proper blending. Pour a small quantity of the primer into a paint tray. Submerge your paintbrush or roller into the primer, ensuring an even coat.
Apply the primer to all parts of the shutter. Pay meticulous attention to corners and crevices to guarantee comprehensive coverage. Afterward, follow the manufacturer's instructions for drying time.
Apply the first coat of paint to the vinyl shutter. Use a paintbrush or paint roller, working vertically. Let the first coat of paint dry per the manufacturer's recommended drying time.
Inspect the shutter for imperfections, missed spots, or areas requiring touch-ups. Depending on the color and coverage, you may need to apply a second or third coat. Consider your desired finish and follow the same steps for each coat.
Latex paint is the best choice for vinyl shutters. Oil-based paints will not adhere well to vinyl, leaving you with a mess. With latex, you can try out any brick and shutter color combinations without the difficulty of cleaning paint off the brick after the fact.

You can paint plastic shutters in place or remove, paint, and reattach them. Be sure to opt for plastic-safe paints.
Clean the plastic shutters thoroughly to remove dirt, dust, and grime. Use sudsy water and a clean cloth. Rinse and let them dry completely. Use painter's tape to mask off areas you don't want to paint, such as window frames or hardware. Place drop cloths or plastic sheets on the ground to catch paint.
If the plastic shutters have a glossy or smooth surface, consider lightly sanding them with fine-grit sandpaper. It helps the primer adhere better. Wipe away any dust after sanding.
Use a plastic-safe primer formulated for plastic surfaces to prep the surface for better paint adhesion. Apply the primer with a paintbrush or paint roller, ensuring even coverage. Follow the primer manufacturer's instructions for drying time.
First, inspect the primed surface for any areas that need sanding to remove drips. If required, lightly sand and remove dust with a clean cloth. Apply the first coat of paint to the plastic shutters. Use a paintbrush or paint roller, working in long, even strokes. Ensure even coverage and a smooth finish throughout the first coat.
Allow the paint to dry thoroughly. Repeat the process one to two times until a smooth and even finish is achieved.
You can use latex paint on plastic shutters, but be sure to use a primer designed for plastic surfaces. Remember to choose your color wisely while you’re at it, as this can greatly impact your home’s overall appearance. For example, a black-painted brick house will look best with similarly neutral shades, like grays and beiges.
Keep the following table on hand when choosing your shutter paint to ensure you buy the right type for your material.
| Shutter Material | Best Paint Type |
|---|---|
| Wood | Oil-based paint |
| Vinyl | Latex paint |
| Plastic | Latex paint with primer |
Depending on the type of paint and primer you use, the cost to paint shutters will set you back about $50 per shutter. Because most houses have a minimum of three to four front-facing shutters, you can expect to pay between $150 and $450 for a complete overhaul. After all, one freshly painted shutter will look better with birds of a feather.
The decision to DIY or hire a local exterior painter should consider your budget, the size and complexity of the project, your level of experience and skill, and your willingness to invest time and effort. DIY may be suitable for small, straightforward projects, like a couple of shutters. However, hiring a professional painter is often better for large, complex jobs like exterior shutters on multiple floors in your home.
Kristi Pahr and Audrey Bruno contributed to this article.
Custom Paint Jobs LLC took our exterior from drab to fab! We couldnt be happier.
From average costs to expert advice, get all the answers you need to get your job done.
The average cost to paint shutters is $350, depending on the size, number of shutters, and labor. Read this guide to learn more about shutter costs.
Estate shutters can add a stately appearance to your home and block out light. Learn how much estate shutters cost, depending on window size and material.
Get expert insights on shutter repair cost, including average prices, key cost factors, and tips to save money on your next shutter repair project.

Painting your window shutters is an easy way to enhance your exterior, but which hues work best? Keep reading to explore the best shutter paint colors.
Learn how to find and hire a qualified exterior shutter repair pro. Get tips on credentials, questions to ask, and costs to restore your shutters.
Discover the perfect shutter colors to complement your gray house, elevate its curb appeal, and enhance the beauty and character of your home.